Kokoda Track aksiyasi - Kokoda Track campaign
| Kokoda Track aksiyasi | |||||||
|---|---|---|---|---|---|---|---|
| Qismi Yangi Gvineya kampaniyasi ning Tinch okeani teatri (Ikkinchi jahon urushi ) | |||||||
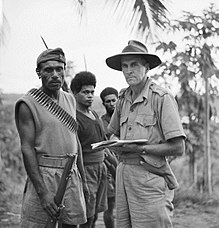
 1942 yil sentyabrda Avstraliya 39-batalyonining askarlari | |||||||
| |||||||
| Urushayotganlar | |||||||
| Qo'mondonlar va rahbarlar | |||||||
| Kuch | |||||||
| 30,000 [1] | 13,500[2] | ||||||
| Yo'qotishlar va yo'qotishlar | |||||||
| 625 kishi o'ldirilgan 1055 kishi yaralangan 4000 dan ortiq kasal [3] | ~ 2,050[4][1-qayd] ~ 4500 kasallarni o'z ichiga oladi.[5][2-qayd] | ||||||
The Kokoda Track aksiyasi yoki Kokoda Trail kampaniyasi ning qismi edi Tinch okeani urushi ning Ikkinchi jahon urushi. Kampaniya 1942 yil iyul va noyabr oylari orasida avstraliyalik bo'lgan bir qator janglardan iborat edi Papua hududi. Bu, birinchi navbatda, yaponlar o'rtasidagi quruqlikdagi jang edi Janubiy dengizlar guruhi general-mayor tarkibida Tomitarō Xori qo'mondonligidagi Avstraliya va Papua quruqlik kuchlari Yangi Gvineya kuchlari. Yaponiyaning maqsadi bu edi Port-Moresbi shimoliy qirg'oqdan quruqlikka ilgarilab, quyidagilarni kuzatib boradi Kokoda treki tog'lari ustida Ouen Stenli tizmasi, Avstraliyani AQShdan ajratib qo'yish strategiyasining bir qismi sifatida.
Yaponiya kuchlari tushdi va o'rnatildi plyaj boshlari yaqin Gona va Bunga 1942 yil 21-iyulda. Qarama qarshi Maroubra Force, keyin to'rttadan iborat vzvodlar ning 39-batalyon va elementlari Papuan piyoda batalyoni, ular tezda rivojlanib, qo'lga olindi Kokoda va uning strategik hayotiy aerodromi 29 iyulda. Kuchaytirishga qaramay, Avstraliya kuchlari doimo orqaga qaytarilardi. Veteran Ikkinchi Avstraliya imperatorlik kuchlari (AIF) 21-brigada qo'lga olishning oldini olish Missiya tizmasi jangi - Brigada tepaligi 6-dan 8-sentyabrgacha. In Ioribayva jangi 13-16 sentyabr kunlari 25-brigada ostida Brigadir Kennet Eather Yaponlarga qarshi kurashni to'xtatdi, ammo maydonni yaponlarga topshirdi va Imita tizmasiga chekindi.
Yaponlar Port-Moresbi ko'z o'ngiga etib borishdi, ammo 26 sentyabrda orqaga chekinishdi. Ular etkazib berish liniyasidan o'tib ketishgan va orqaga qaytish oqibatida chekinishga buyruq berishgan Gvadalkanal. Avstraliyaliklarning ta'qib etilishi atrofda yaxshi tayyorlangan pozitsiyalarning kuchli qarshiliklariga duch keldi Templetonning o'tish joyi va Eora qishlog'i 11 dan 28 oktyabrgacha. Kokodani raqibsiz qaytarib olishdan so'ng, Oivi va Gorari atrofida katta jang bo'lib o'tdi 4-dan 11-noyabrgacha avstraliyaliklarning g'alabasiga olib keldi. 16 noyabrga qadar avstraliyalikning ikkita brigadasi 7-bo'lim kesib o'tgan edi Kumusi daryosi da Vayropi va Yaponiya qirg'oq boshlarida Avstraliya va Qo'shma Shtatlarning birgalikdagi operatsiyasida oldinga siljishdi. Yaponiya kuchlari Buna-Gona 1943 yil 22-yanvargacha o'tkazilgan.
Avstraliyani kuchaytirishni izolyatsiya qilingan, tog'li va o'rmonli erlarda kuchni qo'llab-quvvatlashning logistik muammolari to'sqinlik qildi. Havodan to'ldirish uchun bir nechta samolyotlar mavjud edi va ular uchun texnikalar hali ham ibtidoiy edi. Avstraliya qo'mondonligi Vikers avtomati va o'rta ohak tashish uchun juda og'ir edi va o'rmon sharoitida samarasiz bo'ladi. Artilleriya, minomyot yoki o'rtacha pulemyotlarsiz avstraliyaliklar tog'larga olib borilgan va hal qiluvchi ustunligini isbotlagan tog 'qurollari va yengil gubitsa bilan jihozlangan raqibiga duch kelishdi. Avstraliya kuchlari Yangi Gvineyaning o'rmon muhitida kampaniya o'tkazishga tayyor emas edilar. Ushbu kampaniya va undan keyingi Buna-Gona jangi davomida olingan saboqlar doktrinada, o'qitishda, jihozlarda va tuzilishda keng o'zgarishlarga olib keldi va bu meros shu kungacha saqlanib qoldi.
Yaponlarning shiddat bilan ilgarilashi va tezda qarshi hujumga uchramaganligi sababli, "qo'mondonlik inqirozi" yuzaga keldi, unda general manevr qildi. Duglas Makartur, Oliy qo'mondon ittifoqchi kuchlarning Janubiy-G'arbiy Tinch okeani mintaqasi va general janob Tomas Blamey, ittifoqdosh quruqlik kuchlari qo'mondoni, uchta yuqori martabali avstraliyalik zobitlarning ishdan bo'shatilishiga olib keldi. Makartur va Blameyning generalligi kampaniya olib borilayotgan erlar va sharoitlarni asossiz va real bo'lmagan idrok etishlari uchun tanqid qilindi - bu jangga sodiq qo'shinlarga zarar etkazdi. Kokoda Track kampaniyasi Avstraliyaning mifologiyasiga aylandi Termopillalar va tarkibiga kiritilgan Anzak afsonasi juda ko'p sonli dushmanning old sharti o'sha paytdan beri noto'g'ri ekanligi ko'rsatilgan.
Fon
Strategik kontekst

Keyin Singapurning qulashi, Avstraliya hukumati va ko'plab avstraliyaliklar Yaponiya Avstraliya materikini bosib olishidan qo'rqishgan. Avstraliya bunday hujumga qarshi turishga tayyor emas edi. Butun 8-divizion, Malayaga joylashtirilgan, Ambon, Timor va Rabaul Yaponlar tez rivojlanib borayotganligi sababli yo'qolgan yoki samarasiz bo'lib qolgan.[9] The Avstraliya qirollik havo kuchlari (RAAF) zamonaviy samolyotlarga ega emas edi Avstraliya qirollik floti (RAN) qarshi tura olmaydigan darajada kichik edi Yaponiya imperatorlik floti. RAAF va RAN juda kengaytirildi, ammo bu xizmatlarning eng yuqori darajalariga ko'tarilishi uchun ko'p yillar kerak bo'ldi.[10] The Militsiya safarbar qilingan, ammo katta kuch bo'lsa ham, u tajribasiz va zamonaviy uskunalarga ega emas edi.[11] Tahdidga javoban hukumat AQShdan yordam so'rab murojaat qildi va 6-chi va 7-bo'lim ning Ikkinchi Avstraliya imperatorlik kuchlari (2-AIF) Yaqin Sharqdan qaytarilgan. Buyuk Britaniya bosh vaziri Uinston Cherchill ularni Birma tomon yo'naltirishga urindi, ammo Avstraliya Bosh vaziri, Jon Kurtin, ushbu harakatga ruxsat berishni rad etdi. O'zaro kelishuv sifatida 6-bo'limning ikkita brigadasi tushdi Seylon, ular 1942 yil avgustda Avstraliyaga qaytib kelguncha garnizonning bir qismini tashkil qildilar.[12]
Yaponlar Imperatorning bosh shtabi Avstraliyani bosib olish deb hisobladi 1942 yil boshida, lekin o'sha yilning fevralida bunday qilishga qarshi qaror qildi,[13] chunki bu Yaponiya imkoniyatlaridan tashqarida deb baholandi va hech qanday rejalashtirish yoki tayyorgarlik ko'rilmadi.[14] Buning o'rniga, 1942 yil mart oyida Yaponiya harbiylari Avstraliyani Qo'shma Shtatlardan ajratib olish va qo'lga kiritish orqali ittifoqchilarning hujum harakatlarining oldini olish strategiyasini qabul qildi. Port-Moresbi,[15] The Solomon orollari, Fidji, Samoa va Yangi Kaledoniya.[16][17] Port Moresbini an tomonidan qo'lga olishga urinish amfibiya hujumi, Mo operatsiyasi, tomonidan to'xtatildi Marjon dengizi jangi 1942 yil may oyida. Bir oy o'tgach, yaponlarning aksariyati tashuvchi parki vayron qilingan Midvey jangi, Tinch okeanining janubida yirik amfibik operatsiyalarni amalga oshirish imkoniyatini yanada kamaytirish. Buning ortidan yaponlar port-Moresbiga quruqlikdan o'tish to'g'risida o'ylashni boshladilar.[18][19]

Ayni paytda, ittifoqchilar Oliy qo'mondon ichida Janubiy-G'arbiy Tinch okeani mintaqasi, Umumiy Duglas Makartur Port-Moresbi mudofaasi uchun aerodromlarni rivojlantirish va yaponlarga qarshi zarba berish yo'lida. Ulardan birinchisi, Boston operatsiyasi 20-mayda rasmiylashtirildi va dastlab Abau-Mullins Makoni hududida rejalashtirildi. Milne ko'rfazi keyinchalik afzalroq ekanligi aniqlandi va 22 iyun kuni port Moresbidan kema bilan garnizon kuchlari yuborildi. Yana bir chiziq Merauke, janubiy sohilida Gollandiyalik Yangi Gvineya G'arbiy qanotni himoya qilish uchun 22 iyunda vakolat berilgan.[20] 9 iyun kuni Makartur so'roq qildi Umumiy Janob Tomas Blamey, quruqlikdagi yondashuvni himoya qilish bo'yicha ko'rilgan choralar to'g'risida ittifoqdosh quruqlik kuchlari qo'mondoni Bunga. Ushbu qo'shinni Kokodaga joylashtirish uchun poezdlar to'plami.[21][22] Makartur Buna hududida aerodromni rivojlantirish masalasini ko'rib chiqa boshladi. 10 va 11 iyul kunlari uchuvchi qayiqqa tushgan dastlabki razvedka ishlari olib borildi. "Operation Providence" aerodromni qurish uchun buyurtmalar qabul qilindi Yangi Gvineya kuchlari (NGF) 17-iyulda, ammo 18-iyulda etti kunga qoldirildi va ko'p o'tmay Yaponiyaning qo'nishidan keyin bekor qilindi.[23][24][25][26]
Geografiya

1942 yilda, Papua Avstraliya hududi bo'lgan.[27] Kichik rivojlanish bo'lgan va Port Moresbi atrofidagi infratuzilma, asosan, mahrum bo'lgan.[28] Urushgacha bo'lgan iqtisodiyot asosan kopra va kauchukka asoslangan edi - qirg'oqbo'yi mintaqalarda vaqti-vaqti bilan plantatsiyalar tashkil qilingan va kon qazish.[27] Port Moresbining ma'muriy markazi asosiy aerodrom va port inshootlariga ega edi. Port-Moresbi yaqinidan tashqarida hech qanday yo'l yo'q edi va zamonaviy me'yorlarga ko'ra, bu yo'llardan biroz ko'proq edi. Natijada, Port-Moresbidan shimolga sayohat asosan havo yoki dengiz orqali amalga oshirildi.[29] Port Moresbi atrofida bir nechta qo'nish maydonlari bor edi, boshqalari esa Ouen Stenli tizmasining shimoliy qismida Buna va Kokoda hukumat stantsiyalarida.[30][3-qayd]
Qishloq Kokoda Ouen Stenli tizmasining shimoliy tog 'tepaliklarida joylashgan platoda joylashgan. U shimolda Yodda vodiysiga (Mambare daryosi tomonidan tashkil etilgan) qaraydi. Mambare taxminan janubi-sharqdan shimoli-g'arbiy tomonga o'tadi. Kokoda Yaponiyaning qirg'oq bo'yidagi pozitsiyalarining bir qismini tashkil etgan Buna qirg'oq bo'yidagi qishloqdan taxminan 100 km (62 milya) to'g'ridan-to'g'ri chiziq. Biroq, quruqlikdagi yo'l taxminan 160 kilometr (100 mil) bo'lgan.[32] Sohilga olib boradigan yo'l, Kokododan taxminan 25 kilometr (16 mil) sharqda, Vayropidagi Kumusi daryosini kesib o'tadi. Daryo u erda tel arqon ko'prigi (Wairopi - Pidgin simli arqon uchun) bilan bog'langan.[33] U erdan qirg'oqqa olib boradigan keng yo'l bor edi, keyinchalik yaponlar transport vositalarining harakati uchun yo'l sifatida rivojlanishga kirishdilar.[34][4-qayd]
1942 yilda qishloqda hukumat stantsiyasi, rezina plantatsiyasi va strategik ahamiyatga ega bo'lgan aeroport joylashgan edi. Kokoda trassasi - bu Kokodadan 96 km (60 milya) quruqlikdan (to'g'ri chiziq bo'ylab 60 km (37 milya)) taxminan janubi-g'arbda o'tadigan piyoda yo'l. Ouen Stenli tizmasi Port Moresbi tomon. Bu urushdan oldin ma'lum bo'lgan va quruqlikdagi pochta yo'li sifatida ishlatilgan. Kampaniya paytida janglar bilan bog'liq bo'lgan "asosiy trek" mavjud bo'lsa-da, xuddi shu umumiy yo'nalishni kuzatib boradigan ko'plab parallel, o'zaro bog'liq treklar mavjud. Yo'lning janubiy uchi endi Port Moresbidan 61 kilometr (38 milya) masofada joylashgan Owers burchagidan boshlanadi deb hisoblanadi.[36] Port Moresbidan transport vositasi dastlab McDonald's [Corner] da tugagan va u erda McDonald uy-joyiga xizmat ko'rsatgan. 1942 yil iyundan sentyabr oyi oxirigacha Owers burchagiga qadar cho'zilgan 11 kilometr (7 milya) yo'l qurib bitkazildi.[37]
Kokoda trassasi dastlabki urush yillarida "(Kokoda) Gap" deb nomlangan narsadan o'tdi.[38] Gapni noaniq kashfiyotchilarning ma'lumotlari orqali bilib olgan yaponlarga,[39] potentsialdan koridor taklif qildi Bunga Ouen Stenli orqali Port Moresbida tez harakatlanishni boshlashi mumkin edi. Aksincha, ittifoqchilar bu tor va asosan o'tib bo'lmaydigan yo'l bo'lib, uni faqat cheklangan resurslar bilan to'sib qo'yish mumkin edi.[40] Darhaqiqat, Gap - bu Ouen Stenli tizmasidagi kengligi taxminan 11 kilometr (7 milya), bu masofani kesib o'tgan samolyotlar uchun qulaydir.[41]
Trek 2190 metr balandlikka etadi (7 185 fut) Bellami tog'i.[42] Yo'lning butun uzunligi bo'ylab 5000 metrgacha (16000 fut) yuqoriga va pastga muntazam ravishda ko'tariladi va tushadi.[5-yozuvlar] Bu bosib o'tiladigan masofani sezilarli darajada oshiradi, garchi bir nechta tekis joylar, ayniqsa atrofida Myola. O'simliklar asosan zich o'rmondir. Iqlimi asosan issiq va nam bo'lib, ko'p yog'ingarchilik bo'ladi, lekin yuqori qismlari sovuq, ayniqsa kechasi. Yuqori balandliklar bulut darajasidan yuqori bo'lib, tumanga olib keladi.[43]
Myola suv havzasiga yaqin. Myoladan oqib o'tadigan oqim shimoliy suv havzasidagi Eora Kriki bosh qismining bir qismidir.[45] Yo'lning shimoliy qismida, Deniki tomon yo'nalishini Eora Creek belgilaydi. Bu vodiy tomonidan hosil bo'lgan tik vodiyning yon tomoni bo'ylab harakatlanadi. Daryoning bo'ylab bir necha nuqtada bir tomondan ikkinchi tomonga o'tib ketadi. Denikidan yo'l Kokoda platosiga tushadi.[46]
Kasallik

Yangi Gvineyadagi operatsiyalar kabi tropik kasalliklar ta'sir ko'rsatdi bezgak, dang isitmasi, scrub typhus, tropik yaralar, dizenteriya bir qator sabablardan va qo'ziqorin infektsiyalari. Walker Kokoda Track "bezgak bilan boshlanadi va tugaydi". Bezgak vektorlar trassa bo'ylab salqinroq, balandroq balandliklarda deyarli yo'q edi. Ushbu hududlarda kuzatilgan aksariyat holatlar birlamchi infektsiyalar emas, balki relapslar edi. Port Moresbining yaqin atroflari nisbatan quruq. Bu bezgak xavfini yumshatish tendentsiyasiga ega bo'lsa-da, kasallikning muhim ko'rsatkichlari Yangi Gvineyaga portni himoya qilish uchun yuborilgan qo'shinlarda, asosan militsiyada, kampaniya boshlanishiga olib keldi. Bezgak xavfi, ayniqsa, yo'lning janubiy uchi atrofidagi qirg'oq hududida faoliyat yuritayotgan qo'shinlar va Avstraliya kuchlari Imita tizmasiga qaytishga majbur bo'lganida katta edi. Yaqin Sharqdan qaytib kelgan AIF bo'linmalari ushbu kasallik tahdidini yaxshi bilar edi va etkazib berish bilan birga kelgan xinin. Ushbu sabablarga ko'ra kasallik operatsiyalarga ahamiyati yoki ta'sir darajasida bo'lgani kabi bo'lmagan Milne ko'rfazi yoki undan keyingi operatsiyalar Buna-Gona.[47]
Anderson Avstraliya qo'shinlari orasida dizenteriya tarqalishi haqida gapirib beradi,[48] Jeymsning so'zlariga ko'ra, "tobora ko'proq [yaponcha] kasalliklarga, shu jumladan dizenteriya kasalligiga chalingan", ular trek bo'ylab ketayotganda.[49] Uoker ichakdagi yuqumli kasalliklarni dala gigienasi, ifloslangan va tozalanmagan suv hamda kampaniya boshlanishida yo'l bo'ylab etarli darajada sanitariya qoidalarini bajarmaganlik bilan izohlaydi. Shuningdek, u diareya buzilishlarining bir qismi yuqtirishga emas, balki yomon dietaga (xususan, konservalangan mol go'shti tarkibidagi yog'ning yuqori miqdori) bog'liqligini aniqladi.[50]
Yaponiya kuchlari
The Yaponiya 17-armiyasi general-leytenant boshchiligida Harukichi Xyakutake yangi Gvineya, Gvadalkanal va Sulaymon orollari kampaniyalarida qatnashgan Rabaulda joylashgan korpus kattalikdagi buyruq edi.[51] Marjon dengizidan keyin 17-armiya Port-Moresbidagi quruqlikdan o'tishni ko'rib chiqdi. Bu urushgacha bo'lgan razvedkaga asoslanib, uni Kokoda bilan bog'laydigan yo'l mavjud edi. Dastlabki samoviy razvedka natijasiz edi, ammo kuchga ega bo'lgan razvedka uchun rejalar tuzilgan va bunday yo'nalishda ilgarilash imkoniyatidan foydalanish. Bu vazifalarni bajarish uchun 15-mustaqil muhandislar polki (bitta rota) va general-mayor Tomitaro Xorii boshchiligidagi Janubiy dengizlar otryadi tayinlangan. O'sha paytda Xori duch kelishi mumkin bo'lgan moddiy-texnik qiyinchiliklarni hisobga olgan holda muvaffaqiyatga erishish ehtimoli haqida g'ayratli edi, ammo u o'z e'tirozini bostirmadi.[18]
15-mustaqil mustaqil muhandislar polkining polkovnigi Yokoyama Yosuke boshchiligidagi avans partiyasi polkning asosiy kuchi - 1-batalyondan iborat bo'lishi kerak edi. 144-piyoda polki va 55-tog 'artilleriya polkining 1-rota, 1-batalyoni. Shuningdek, uning tarkibiga 500 nafar koreys va formosanlik ishchilar va 2000 ta Rabauldan kelgan mahalliy ishchilar kiritilgan.[52] 5-Yokosukaga asoslangan dengiz kuchlari Dengiz qo'nish partiyasi oldindan ziyofat bilan bir vaqtda qo'nish va Bunada aerodrom qurishni boshlash kerak edi.[53] Yaponiya rejalashtirish quruqlikdagi hujum sodir bo'lishiga asoslanib davom etdi.[54]

Dastlabki qo'nish 1942 yil 21-iyul kechqurun sodir bo'ldi.[53] Darhol Kokoda tomon piyoda askarlar jo'natildi.[35] Yokoyama qo'nish partiyasining ikkinchi komponenti 29 iyulda etib keldi. Hodisa keyingi haftalar davomida ketma-ket konvoylar tomonidan kuchaytirildi.[55] 144-piyoda polkining asosiy kuchi 18 avgustda qo'ndi. The 41-piyoda polki (1-batalyondan kam) 21-avgustda, 1-batalyon esa 27-avgustda qo'ndi.[56]
Xori Kokodadagi avans partiyasi bilan bog'lanib, quruqlik bo'ylab harakatlanish uchun o'z kuchini to'play boshladi. 26-avgustga qadar u 144-piyoda polkidan (uchta batalon), 41-piyoda polkidan (2-chi va 3-batalyonlar, 1-batalyon hali kelmagan - 14 sentyabr kuni asosiy kuchga qo'shilgan) iborat edi.[57] va 55-tog 'artilleriya polkining birinchi batalyoni.[58] 3-batalyonga kuchlarning aloqa chizig'ini himoya qilish vazifasi topshirildi.[59] 41-piyoda polki atigi 1900 askarni jalb qildi, chunki har ikkala 1-va 3-batalyonlarda yo'l qurish va etkazib berish vazifalari uchun har biridan taxminan 400 kishi ajratilgan edi.[60] Kuch kuchi 6000 ga teng deb taxmin qilingan.[61] Xori o'n olti kunlik ratsionni ko'tarib yurgan har bir kishi bilan oldinga o'tishni boshladi.[62] Ikkala polkning qo'shinlari tajribali faxriylar edi.[63] Malayada 41-piyoda polki avstraliyaliklarga qarshi kurashgan edi.[64]
Avstraliya kuchlari
Avstraliyaning Papua hududlari va Yangi Gvineya Brigada boshchiligida Avstraliyaning 8-harbiy okrugini (keyinchalik Yangi Gvineya kuchlari etib tayinlandi) tashkil etdi Basil Morris. Tinch okeanida urush yaqinlashganda, ikkita mahalliy militsiya bo'linmasi bor edi: Papua piyoda batalyoni (PIB) va Yangi Gvineya ko'ngillilarining miltiqlari. Borayotgan keskinliklar bilan 49-batalyon 1941 yil mart oyida Port-Moresbiga jo'natildi. 1942 yil 3-yanvarda 49-batalyonga 39-va 53-chi Qo'mondonligidagi batalyonlar 30-brigada.[65][66]
May oyi oxirida Port Moresbini himoya qiluvchi kuchlar soni ko'paytirildi 14-brigada dan iborat 3-chi, 36-chi va 55-chi Batalyonlar.[67] Militsiya bo'linmalari yomon o'qitilgan deb hisoblanardi, ammo ularni tajribali kichik ofitserlar bilan to'ldirish uchun bir oz harakat qilingan bo'lsa ham,[68][6-eslatma] Yangi Gvineyadagi ko'p vaqtlari mashg'ulotlarga emas, balki mehnatga sarflangan. 53-batalyonda ruhiy holat ayniqsa past edi. Taxminan yuzga yaqin harbiy xizmat boshqa militsiya bo'linmalaridan qisqa muddatlarda olingan. Dekabr oyi oxirida kemaga chiqish bilan ular Rojdestvo ta'tilidan mahrum bo'lishdi. Shimoliy Kvinslendga etib borish uchun ular Yangi Gvineyaga yo'l oldilar. Noqulaylik ruhiy holatga putur etkazdi va batalyonning keyingi faoliyati uchun muhim omil sifatida qayd etildi.[65][69]

Port Moresbini himoya qilish bilan bir qatorda Yangi Gvineya kuchlari atrofdagi yaponlarning qo'nish joylariga qarshi operatsiyalarni boshqargan Vau 1942 yil 8 martda sodir bo'lgan va Milne ko'rfazida aviabaza qurishni boshlagan.[70][71] 2-AIFning 7-bo'limi Yangi Gvineyaga joylashtirilishi kerak edi - uning 21 va 25-brigadalari Port Moresbi mudofaasiga tayinlangan, 18-brigadasi esa Milne ko'rfaziga yuborilgan.[72][73]
1942 yil 12-iyunda Morris PIBga shimoliy qirg'oqning keng maydonini qo'riqlashni buyurdi: Kokodadan taxminan 60 kilometr shimoliy-sharqda joylashgan Ioma; Avola, Kokoda va Gona o'rtasida; va, Tufi, kuni Keyp Nelson - shtab-kvartirasi Kokoda. Mayor tomonidan boshqariladigan batalon Uilyam Uotson, umumiy kuchi 310 ta uchta kompaniyadan iborat edi, shu jumladan 30 ta yevropalik - asosan ofitserlar va katta ofitserlar. Uning roli razvedka edi.[74][75][7-yozuvlar] Yaponiyaning Buna atrofiga qo'nishni rejalashtirayotgani haqida ma'lumot bor edi. 22 iyun kuni Morris LHQdan Port Moresbini oldinga himoya qilish uchun Kokodaga "Avstraliya piyoda qo'shinlarini" joylashtirish to'g'risida buyruq oldi.[77][8-yozuv]
Taxminan iyul oyining o'rtalarida GHQ Buna atrofida aerodromni rivojlantirish uchun "Providence" operatsiyasini rejalashtirgan edi.[79] 17-iyulda Morrisga Providence operatsiyasi uchun buyruqlar berilganda, u 39-batalyonni Buna hududini garnizon qilish rejasi bo'yicha talab qilinadigan kuch sifatida ishlatmoqchi edi.[25] 39-batalyonning dastlabki joylashuvi umuman boshqacha maqsadga ega edi. Muallif, Yustas Keog, buni aniqlab beradi:
15 iyulda general Makartur ushbu yo'nalishdagi birinchi forvard haqida buyruq chiqardi [Buna-Gona degan ma'noni anglatadi]. Ushbu buyruqlar asosida avstraliyalik piyoda askarlar va amerikalik muhandislarning kichik bir qismi Kokoda yo'li bo'ylab Buna tomon yurishlari kerak edi. Ob'ekt Dobodurada aerodrom qurish edi. Aslida, bu harakatning quruqlik qismi allaqachon boshlangan edi, garchi u umuman boshqa maqsadga ega edi. 20 iyunda General Blamey ... Morrisga Kokoda hududi va uning aerodromini himoya qilish uchun choralar ko'rishni buyurgan edi ... PIB tomonidan oldin 39-ning etakchi kompaniyasi 26 iyun kuni Illolodan chiqib ketishi kerak edi. Aslida kompaniya ushbu punktni 7 iyulgacha qoldirmadi.[21]
23-iyun kuni 39-batalyonning bir rota uchun Kokodaga joylashishiga, unga batalyonning qolgan qismi qo'shilishi mumkinligi to'g'risida dastlabki buyruq berildi. Bunga batalonni (bitta rota kamroq) joylashtirish uchun 24 iyunda o'zgartirish kiritildi.[80] Buning uchun asbob NGF Operatsion Ko'rsatmasi 18 edi. U PIBni 39-batalyon qo'mondonligiga topshirdi. Shuningdek, qo'llab-quvvatlash uchun xizmat ko'rsatish bo'linmalarining otryadlari tayinlangan. Qo'shimchalar podpolkovnik qo'mondonligi ostida joylashtirilgan Uilyam Ouen, 39-batalyonning qo'mondoni. Kod so'z sifatida "Maroubra" tayinlandi.[81] Illolo-da yig'ilgan avans partiyasi, batalyonning B kompaniyasi. 8 iyulda jo'nab ketdi, 15 iyulda Kokoda shahriga etib keldi.[82]
Kod so'zi sifatida "Maroubra" kampaniyada trekdagi operatsiyalar va avstraliyalik kuchlarni oldinga yo'naltirish uchun ishlatishda davom etdi - garchi manbalarda "Maroubra Force" ga havolalar biroz sirli bo'lsa ham.[9-qayd]
Buna va Gona atrofiga kelib tushgan yaponiyaliklar 39-batalyonning B kompaniyasini Kokoda va C kompaniyalarida pozitsiyada ilgarilab 23-iyul kuni jo'nab ketishganini ko'rishdi. Batalonning qolgan qismi harakatlanishga tayyor edi va batalonning katta qismi 4 avgustgacha Denikiga etib bordi.[84][85]
Kampaniya
Umumiy nuqtai
1942 yil 21-iyulning erta oqshomida yapon qo'shinlari yaqinga tushishdi Gona.[35] Yaponiyaning oldinga siljish partiyasi 23 iyul kuni tushdan keyin Vayropida Kumusiga etib boradigan Kokoda tomon tezlik bilan harakat qildi.[86] PIB va avstraliyaliklar pistirmalar bilan rivojlanib kelayotgan yaponlarni jalb qilishdi. B kompaniyasi, 39-batalyon, 26 iyulda Oivi yaqinida turish uchun kuch (shu jumladan, PIBdan qolgan narsalarni) yig'di. Bitta vzvod Kokoda qoldi. Qurol bilan tahdid qilingan Oividagi kuch Deniki tomon janubga qarab chekindi. Aloqa uzilib, Kokodadagi vzvod ham 27-iyul kuni Denikiga qaytib ketdi. Kuch qayta yig'ilgach, u 28 iyulda qarshiliksiz qishloqni egallab oldi. Kokodadagi birinchi jang 28-29 iyul kunlari bo'lib o'tdi. Takroriy va qat'iyatli hujumlar avstraliyaliklarning Denikiga qaytishiga sabab bo'ldi. 39-batalyonning qo'mondoni Ouen janglarda o'lik jarohat oldi.[87]
Yaponiya avansida bir oz to'xtab qoldi. 39-batalyonning qolgan kompaniyalari quruqlikka etib kelishdi va kuchni boshqarishni 30-brigadaning brigada mayori mayor Allan Kemeron tayinlandi. U 8 avgust kuni Kokoda tomon hujum qilishni rejalashtirgan, uchta kompaniya turli yo'nalishlarda harakat qilgan. Ikki kompaniyani ushlab turishdi va nafaqaga chiqishga majbur qilishdi. Kompaniya Kokodani egallab olishga muvaffaq bo'ldi, ammo izolyatsiya qilingan va hujumga uchragan holda, 9 avgustga o'tar kechasi chekinib ketdi. 39-batalyonning kompaniyalari 12 avgustgacha Denikiga chiqib ketishdi va ertasi kuni ertalab ularga hujum qilishdi. Qo'rqinchli tahdid bilan batalon 14 avgust kuni ertalab Isurava tomon chekinishni boshladi.[88]
Ayni paytda 53-batalyon va Brigada boshchiligidagi 30-brigada shtab-kvartirasi Selvin Porter yordam sifatida yuborilgan. Brigada boshchiligidagi 2-AIF 21-brigadasining ikkita batalyoni Arnold Potts quyidagilar. Porter tomonidan Isuravada 30-brigada bilan 21-brigada kuchlari tomonidan bo'shatilgan mudofaa pozitsiyasi o'rnatildi. Pottsning etakchi batalyoni yaqinlashganda, u relyefni amalga oshirish uchun qo'shma kuchlar qo'mondonligini oldi. Biroq, yaponlar oldinga siljishdi va 26-31 avgust kunlari to'rtta yapon batalonlari sodir bo'lgan jang boshlandi. 53-batalyon sharqiy qanotni xavfsizligini ta'minlay olmadi va yaponlarning Avstraliya frontiga qo'mondonlik mavqeini egallashi bilan, oxir-oqibat avstraliyaliklarni tark etishga majbur qildi. Keyin 21-brigada 31 avgust va 5 sentyabr kunlari Eora qishlog'idan Templeton o'tish joyiga chiqib ketayotganda bir qator kelishuvlarga qarshi kurash olib bordi.[89]

25 avgust kuni yaponlar Milne ko'rfaziga kelib tushishdi, ammo u erda avstraliyaliklarning pozitsiyasi mustahkamlanib, Pottsning 21-brigadasining uchinchi bataloni trek bo'ylab janglarga qo'shilish uchun ozod qilindi. Ushbu kuchaytirish bilan u Mission Ridge-da Brigade Tepasidan oldinga qarab yugurib chiqishga qaror qildi. 6-9 sentyabr kunlari bo'lib o'tgan janglarda brigadaning ikkita batalyoni qamaldan qochib chekindi, 2/27-batalyon esa uch hafta o'tgach, uning qoldiqlari o'rmondan chiqmaguncha yo'qolib qolishidan qo'rqishdi.[90]
Jangdan so'ng, Potts Port Moresbiga chaqirildi, unga Porter buyruq berildi. Tugagan 21-brigada Ioribayva tizmasiga olib ketilgan. U 3-batalyon tomonidan kuchaytirildi va Eather boshchiligidagi 25-brigada yordamni kutdi. Eather birlashgan kuchga qo'mondonlik qildi, ammo yaponiyaliklar uning batalyonlari o'rnini egallab turgan paytda hujum qilishdi - 14-16 sentyabr kunlari janglar. U Imita Ridge-da chekinish va mustahkamlash uchun ruxsat oldi - bu Trek bo'ylab so'nggi mudofaa pozitsiyasi. Ayni paytda, Amerika kuchlari 7 avgust kuni Guadalkanalga tushgan edi. Ikkala operatsiyani ham qo'llab-quvvatlay olmagan Xori orqaga qaytishni buyurdi. 28 sentyabr kuni Eather yapon pozitsiyalariga hujum qilganida, ularni tashlab qo'yilgan deb topdi. Avstraliya kuchlari ehtiyotkorlik bilan yaponlarning chiqib ketishini ta'qib qildilar. The 16-brigada avansga sodiq edi va to'g'ridan-to'g'ri qo'mondonlik general-mayor tarkibida 7-bo'limga o'tdi Artur "Tubbi" Allen.[91]
25-brigada oldi avangard. 10 oktyabrda Myola raqibsiz ravishda ishg'ol qilindi va Yaponiya mudofaasi bilan aloqa o'rnatildi. 25-brigada 16-oktabrdan 16-brigada 20-oktabrga qadar bosib o'tib, Eora qishlog'iga qarab borguniga qadar 16-oktabrdan Templeton chorrahasida turdi. Bu erda avans 28-oktabr kuni yapon qo'shinlari chiqib ketguncha o'tkazildi. Makartur tomonidan avansni tezlashtirish uchun bosim o'tkazgan Allan o'rniga general-mayor tayinlandi Jorj Vasey 28 oktyabrda. 7-diviziya Kokoda tomon yurishdi va patrul uni bo'sh emasligi haqida xabar berganida, 2-noyabr kuni qaytarib olindi.[92]
4-dan 11-noyabrgacha Oivi va Gorari atrofida yana bir jang bo'lib o'tdi. Vasey qanotni burib, yaponlarni tor-mor keltira oldi. 15-noyabrda 7-divizion Kumusi daryosidan o'tib, Buna-Gona sohilbo'yi tomon yurishni boshladi.[93]
Yaponiyani olib chiqish sabablari

Kokoda trek aktsiyasi bo'lib o'tayotgan paytda yaponlardan iborat yapon bosqinchi kuchi Maxsus dengiz-desant kuchlari 1942 yil avgustda bo'linmalar Yangi Gvineyaning sharqiy uchida joylashgan strategik qimmatli Milne ko'rfazini egallab olishga urinishgan. Milne ko'rfazidagi jang, 1942 yil 25 avgustdan 7 sentyabrgacha bo'lgan davrda,[94] Yaponiyaning mag'lubiyatiga olib keldi. Bu Yaponiyaning birinchi taniqli mag'lubiyati edi va Tinch okeani teatri bo'ylab ittifoqchilarning ruhiyatini ko'tardi.[95]
Ittifoq kuchlari Gvadalkanalda qurilayotgan Yaponiya aerodromini va 19000 ni aniqladi AQSh dengiz piyodalari aerodromni egallashga kirishdilar.[96] 7-avgust kuni amfibiya qo'nish amalga oshirildi.[97] Jang 1943 yil 9-fevralgacha davom etdi[98] va quruqlikda, dengizda va havoda qattiq tortishuvlarga duch keldi.[99] Xyakutakening 14 sentyabrda orolni qayta egallashga qaratilgan dastlabki harakati Xenderson Maydon mag'lubiyatga uchradi. Tengsiz jangda general-mayor Kiyotake Kavaguchi Qo'shinlar kuchlari qariyb 850 nafarini, Amerika dengiz piyodalari esa 104 nafarini yo'qotdi.[100] Bu xabar Yaponiyadagi Imperatorlik Bosh shtab-kvartirasiga etib kelganida, ular favqulodda sessiyada yangi Gvineyada ham, Gvadalkanalda ham jabhalarni qo'llab-quvvatlay olmasliklariga qaror qilishdi. Xyakutakening ta'kidlashicha, u faqat Gvadalkanaldagi ittifoqchilar kuchlarini mag'lub etish uchun etarli kuch va materialga ega. U aerodromni qaytarib olish uchun yana bir urinishda Gvadalkanalga ko'proq qo'shin yuborishga tayyor edi. Yaponiya qo'mondonlik shtabining kelishuvi bilan u Xoriga Gvadalkanaldagi masala hal bo'lgunga qadar Kokoda yo'lidagi qo'shinlarini olib chiqib ketishni buyurdi. Yaponiya qo'shinlari bir necha hafta davomida toliqqan janglar va og'ir yo'qotishlardan so'ng, Port Moresbidan 32 kilometr (20 milya) uzoqlikda joylashgan Ioribayvada edilar.[101] Shuningdek, Ittifoq kuchlari istalgan vaqtda Buna shahriga qo'nishi mumkin degan xavotirlar mavjud edi.[102]

Bullard o'z tarjimasining kirish qismida quyidagilarni ta'kidlaydi:
... avgust oyining oxiridan boshlab Tokio shahridagi 17-armiya va armiya bosh shtabidan qo'mondon Xoriga Janubiy Dengiz kuchlarining janubga qarab yurishini to'xtatish uchun ko'plab buyruqlar va ko'rsatmalar berilgan edi. Biroq, bu buyruqlar sentyabr oyi oxirigacha pul olib chiqish boshlangunga qadar e'tiborsiz qoldirildi. Chekishga qaror qilish uchun bir necha omillar ko'tarildi - Ittifoqning Buna shahriga qo'nishi tahdidi, etkazib berish holati va Kavaguchi otryadining Gvadalkanalni qaytarib olmaganligi.[103]
Avansni to'xtatish bo'yicha ushbu ko'rsatmalar 16 avgustdan boshlab paydo bo'lgan: "Urushdan keyin intervyu bergan yuqori darajali yapon zobitlari bu kechiktirishga ta'sir qiluvchi omil Gvadalkanal emas, aksincha" kutilgan avstraliyaliklarning Kokodadagi qarshiligidan kuchliroq "deb o'ylashgan."[104]
Bullard 28 avgustdagi Xoriga "Ouen Stenli tizmasining janubiy yon bag'irlariga ko'tarilish uchun ... lekin kelajakdagi operatsiyalarga tayyorgarlik ko'rish uchun asosiy kuchingizni oraliqning shimoliy qismida to'plang" buyrug'i haqida xabar beradi.[60] Bullard "janubiy yon bag'irlari" ni belgilashga nisbatan noaniqlik darajasini qayd etadi.[64] 8 sentyabrda 17-armiya Horiga Kokoda hududida 41-polkni yig'ishni buyurdi.[57] Horii kuchining asosiy qismini qaytarib oldi, lekin oldinga intilishda davom etdi.[105] 19 sentyabrda Xyakutake Ioribayvaning 16 sentyabrda ishg'ol qilinganidan xabardor bo'lganida, u "oldingi chiziq qo'shinlariga zudlik bilan Mavayining shimolidagi pozitsiyani egallashlari to'g'risida qat'iy buyruqlar berdi".[106][10-qayd] 23 sentyabrdagi buyruq Isurava-Kokoda hududini "kelgusi operatsiyalar uchun asos" sifatida himoya qilish edi.[107][11-qayd] Xori ta'minot liniyasini ishlatib yuborgan edi, shuning uchun uning kuchi haddan tashqari me'yorga duch keldi va oldinga bora olmadi.[109] 24 sentyabrda 2/144-batalyon Ioribayvadan chiqib ketdi.[110] 3-chi / 144-chi batalyon orqa qo'riqchini tuzdi va 26-sentabrga o'tar kechasi orqaga qaytdi.[111]
Logistika

Ittifoqdosh logistika
Ushbu kampaniya va Yaponiyaning Buna va Gona atrofidagi plyaj qirg'oqlarida boshlangan jang, har ikki tomon uchun ham, relef tomonidan belgilangan cheklovlar va o'z kuchlarini o'zlari duch kelgan sharoitda etkazib berish va saqlab turish imkoniyati bilan belgilandi. - dedi Morris general-leytenantga Sidney Rouell NGF qo'mondonligini topshirishda: "Tog'lar Nipsni mag'lub qiladi va biz ularni urmasliklariga ehtiyot bo'lishimiz kerak."[112]
Infrastrukturadan mahrum Morris Port-Moresbidagi port va aerodrom inshootlarini kengaytirish, takomillashtirish va rivojlantirish bo'yicha doimiy dasturni amalga oshirishni rejalashtirgan edi. Tatana orolida oktyabr boshida ochilgan T shaklidagi iskala qurildi. Bu portning imkoniyatlarini ikki baravarga oshirdi.[113] GHQ buyurtmasi bilan Milne ko'rfazida aerodrom va undan keyingi port inshootlari ishlab chiqildi. Bu erda ittifoqchilar kuchlari o'sha erda sodir bo'lgan yapon qo'nishiga qarshi turish uchun joylashtirilgan. Yo'llar deyarli yo'q edi. Maroubra Force-ni Kokoda leytenantiga yuborish to'g'risidagi buyruqlar bilan birgalikda Bert Kienzle uni to'ldirish uchun quruqlikdan yo'l qurishni buyurdi. Tarixchi Piter Brun buni "hozirgacha berilgan eng kulgili" buyruqlar deb ta'riflaydi.[114] 1942 yil sentyabr oyi oxirida McDonald's dan Owers burchagiga qadar 11 kilometrdan (6,8 milya) ko'proq yo'l qurib bitkazildi.[37][115]
Kienzle Templetonning 39-batalyonning B kompaniyasini Kokodaga olib boruvchi yo'l bo'ylab olib bordi. Ular ketayotganda, Kienzle yo'l bo'ylab stantsiyalarni aniqladi va ularni ta'minlash uchun choralar ko'rdi. Ular Kokodaga etib kelishganida, oziq-ovqat kam bo'lib qoldi. Kienzle Yodda vodiysidagi uyiga qisqa tashrif buyurdi va materiallar bilan qaytib keldi.[82] Yurish askarlar uchun har qanday og'ir texnikani ko'tarib yurish uchun juda og'ir deb hisoblangan. Bunga etkazib berish va boshqa jihozlarni etkazib berish uchun qirg'oq kemasi uchun kelishuvlar amalga oshirildi. Yaponlar Gona yaqinidagi shimolga, Basabua shahriga qo'nishni boshlashdan bir kun oldin tushirilgan.[116][12-qayd] Kokoda ushlab turilganida, samolyotga qo'nish orqali zaxiralarni to'ldirish mumkin edi. Ouen 24 iyulda qo'mondonlikni qabul qilish uchun Kokodaga uchib ketdi. 26 iyulda D kompaniyasining bir vzvodi qo'ndi. Ishga yaroqli samolyotlar yo'qligi sababli, bu bitta samolyot bilan ikkita liftda amalga oshirildi.[13-qayd]
Quruqlikdan qaytib, Kienzle etkazib berish holati to'g'risida ma'ruza qildi. Yuk ko'taruvchi 13 kunlik ratsionga teng yuk ko'tarishi mumkin. Agar u bir askarga ratsion berib tursa, ular orasidagi yukni 6½ kun ichida iste'mol qilishadi. Bu o'q-dorilar, boshqa zarur jihozlar yoki yuk tashuvchini qaytarish uchun hech qanday yordam bermadi. Kokodaga sayohat 8 kun edi. U katta miqdordagi havo tomchilari bo'lmasdan operatsiyalarni davom ettirish mumkin emas degan xulosaga keldi.[118] Aerial resupply commenced with drop sites at Kagi and Efogi but neither site was particularly suitable. Significant quantities fell outside the drop zone and could not be recovered. Unreliable maps or poor visibility in the drop zone meant that supplies were often misdropped. Recognising that a better drop zone was needed, Kienzle set out on 1 August, to find a large open area he recalled having seen from the air. On 3 August, he identified the smaller of two dry lake beds near the crest of the range, which he called Myola.[119] Kienzle immediately requested that dropping begin at Myola. Access to this large area alleviated the proportion of supplies lost to the jungle. It also made the task of carriers achievable. He set about establishing it as a supply camp and cut a new track towards Eora Creek. It joined the existing track at Templeton's Crossing, which he also named.[120][45]

While the discovery of Myola alleviated one of the problems associated with resupply, it did not solve them all. Air drops requested during the second battle at Kokoda were delayed by weather—which frequently interfered with air operations over the range.[121][122] At the start of the campaign, effective air dropping techniques had not been developed. Belated drops to Kokoda were made by fighters because of the lack of transports. Belly tanks were filled with supplies but this could not be widely used.[123] Parachutes were not initially available and, after a quantity were delivered in mid-September, remained in short supply and were reserved for essential equipment.[14-qayd][124] Most supplies were "free dropped". Packaging was primitive by modern standards. Supplies were wrapped in blankets[125] or tied in sacks. There was, however, a conscious choice to utilise packing, such as blankets, that were required by the troops and might otherwise have been supplied separately.[126][15-qayd] The rate of breakage and loss was high—on average, 50 per cent and up to 90 per cent.[127][16-yozuv] Lieutenant Fayle, Allen's aide-de-camp, commented that: "The whole fact of the matter, and NGF seemed unable to understand all through the campaign, was that recoveries were never 100 per cent of the supplies dropped and wastage was at times terrific."[129]
The lack of transport aircraft was another constraint. On 5 August, the only two aircraft available for supply work returned to Australia.[130] On 17 August, a Japanese air raid on Port Moresby destroyed five aircraft and severely damaged eleven others when the aircraft had been parked close together. Of these, seven transports (later dubbed "biscuit bombers")[131][17-yozuv] were destroyed or put out of commission, leaving only one in service.[133] This report by Gillison is indicative since there is considerable variation in the sources as to the number and type of planes damaged and destroyed.[134][135][18-yozuv] What is clear is that this was a disastrous event that significantly curtailed the Allied capacity to resupply the troops fighting along the track. Moremon says that no aircraft were available for dropping until 23 August while McCathy states this as 22 August. Given the tenuous supply situation, this was a significant break.[136][137] Civilian aircraft and pilots were pressed into service in an effort to meet demand. They were mainly used in flights between Australia and New Guinea or in rear areas in order to release military planes and personnel for service in forward areas but this did not solve the immediate problem.[138]

Potts' two battalions commenced their advance along the track on the basis that 40,000 rations plus ammunition and other supplies had been stockpiled at Myola and additional supplies existed at staging points along the route. Potts arrived at Myola on 21 August to find only 8,000 rations (five days' reserve) and a further two days' reserve forward. Potts was forced to hold his force at Myola until a sufficient reserve could be accumulated—which impacted his conduct of the battle at Isurava (commencing 26 August).[139]
The "missing" rations have been the subject of investigation—both at the time and subsequently. Dudley McCarthy, the Australian official historian, concluded that the reason most likely lay in "faulty [staff] work by inexperienced staff".[136] Rowell's investigation, made at the time, determined that the rations had been dispatched.[140] The second and much larger, dry lake bed, Myola 2, was discovered by a patrol on 21 August. At this time, maps showed and air crew expected only one. John Moremon hypothesises that drops were likely made at the wrong one.[141][19-qayd] Rowell noted in his memoirs that "all through the New Guinea Campaign cargo dropping remained notoriously unreliable".[142]

In consequence of this short-fall and the earlier loss of transports at Port Moresby, urgent requests were forwarded by Rowell through the chain-of-command. Transport aircraft in the theatre at this time were largely operated by the Beshinchi havo kuchlari, general-mayor bilan Jorj Kenni commanding Allied Air Forces. MacArthur released six Duglas Dauntless dive bombers, one B-17 uchish qal'asi and two transports. He noted that, at the time, there were only thirty transport planes in Australia and, of these, only 50 per cent were available at any one time.[143] His response stated that the resources being made available should be sufficient for the 9,000 kilograms (20,000 lb) of supplies necessary to supply forces at Vau and along the track (as estimated by Rowell) each day. The figure supplied by Rowell explicitly did not allow for any reserve to be established.[144] MacArthur concluded by saying:
Air supply must necessarily be considered an emergency rather than a normal means of supply. Consequently every effort should be made by the GOC, NGF, to develop other means of supply.[145]
When Potts asked for some additional 800 labourers to help alleviate the supply situation, Rowell replied that only 300 could be provided. There was simply not the labour force available to establish a reserve.[146][136] As Allen was advancing, he estimated that he required 3,000 carriers to support his operations forward of Myola but in late October, there were only 1,250 forward of Myola and none to the rear.[147] During the Australian advance, Myola 2 was developed as the major resupply point.[148] A strip was developed there, being a larger area, but it was considered too risky for general use.[149]

As Potts withdrew from Isurava, Myola was lost—his force destroying anything usable as it left. Successive withdrawals towards the start of the track eased the supply burden. As Allen advanced, following the withdrawing Japanese forces, he was acutely aware of the logistical problems facing his force. He faced pressure from Blamey and MacArthur to advance his forces without being able to assure their supply. His reluctance to do so was a significant factor leading to his replacement.[150] McCarthy observes: "There was little that General Vasey could add immediately to General Allen's planning."[151]
Japanese logistics
Initial Japanese reconnaissance had indicated a trafficable road to Kokoda. Bullard reports the error in this.[62] While the road was improved for vehicle transport to Sonobo, about halfway from Gona to Wairopi, levies from Rabaul and pack-horses would have to carry supplies the remaining distance to Kokoda and further forward. Meanwhile, allied airpower interfered with the Japanese line-of-communication, particularly at the Kumusi River, making it uncrossable by day. Soldiers advanced from Kokoda carrying 16 days' rations. The advance, from the end of July until Ioribaiwa, in mid September was to last for over forty-five days. Their load included ammunition for the artillery and machine guns as well as 18 kilograms (40 lb) of rice per man.[152]
A convoy carrying four independent supply companies destined to arrive at Buna on 20 September was delayed: "The mechanism for maintaining supply for the South Seas Force was broken."[153] By the time the Japanese had advanced to Ioribaiwa, there was extreme rationing and the daily rice ration had been reduced to 180 millilitres (6.3 imp fl oz; 6.1 US fl oz) per day without the prospect of captured stores alleviating the difficulty. Horii's force was unable to advance further.[109] As the Japanese withdrew, it was found that many of the enemy had died of malnutrition with evidence that some Japanese had been reduced to eating wood, grass, roots and other inedible material.[154] Australian soldiers were also confronted with evidence of cannibalism. Dead and wounded Australian and Japanese soldiers who had been left behind in the Australian retreat from Templeton's Crossing were stripped of flesh.[155] In 1987, a Japanese documentary Yuki Yuki te Shingun contained interviews with Japanese soldiers who confessed to cannibalism in New Guinea.[156] The evidence of cannibalism inflamed and angered the feelings of the Australians towards their adversaries.[157]
The Japanese made little use of aerial resupply; an exception recorded is the drop of supplies at Kokoda on 23 September.[107] When Australian forces reoccupied Kokoda, they found the strip there overgrown and unused.[158]
Papuan labour

The pre-war plantation economy of the Australian territories of Papua and New Guinea was based on a system of indentured labour. On 15 June 1942, Morris issued the Employment of Natives Order under the National Security (Emergency Control) Regulations. This provided for the conscription of Papuan labour to support the Australian war effort.[159] While resupply of the Australian forces on the track would have collapsed without airdrops, the native carrier force remained an essential component, moving supplies forward from the drop zones under arduous conditions. Captain Geoffrey 'Doc' Vernon wrote of the conditions endured: "The condition of our carriers at Eora Creek caused me more concern than that of the wounded ... Overwork, overloading ... exposure, cold and underfeeding were the common lot. Every evening scores of carriers came in, slung their loads down and lay exhausted on the ground."[160]
On their return, they would carry back the wounded with care: for which they have been mythologised as the "Loyqa loyqa farishtalar ".[161] There are many testaments of praise for the care rendered.[162] In relation to the carriers, Captain (later Major) Henry Steward wrote after the war that "the men on the stretchers ...[were] ... tended with the devotion of a mother and the care of a nurse", while Frenk Kingsli Norris recounted that, "if night finds the stretcher still on the track, they will find a level spot and build a shelter over the patient. They will make him as comfortable as possible, fetch him water and feed him if food is available—regardless of their own needs. They sleep four each side of the stretcher and if the patient moves or requires any attention during the night, this is given instantly".[163]
The carrier force under command of Kienzle supporting the Australian advance is reported at over 1,600. The total number that worked on the track was significantly larger, with attrition through desertion and sickness. Author Paul Ham estimates a total of up to 3,000 and claims a desertion rate of 30 per cent.[164] The ever-increasing need for labour impacted on the communities from which they were conscripted by reducing the capacity for food production.[165]
The Japanese also relied on native labour to transport supplies for their forces on the Kokoda Track. Around 2,000 indentured workers were transported to the mainland from Rabaul, and a further 300 residents of the north coast of Papua were recruited. These labourers were poorly treated, and suffered from overwork. Many carriers who became sick or injured were murdered by Japanese forces. This mistreatment caused high desertion rates among the Papuan carriers. As the Japanese had difficulty obtaining replacement carriers, the casualties and desertions contributed to shortfalls in the quantities of supplies which reached the combat troops.[166]
Tibbiy

When the 21st Brigade joined the fighting early in the campaign, the medical plan was for evacuation forward to Kokoda, and there, by air, on the premise that it would soon be recaptured. This was discarded as it quickly became apparent that this would not happen and any serious casualties were moved back toward Myola. Potts had requested air evacuation but this was refused for a lack of suitable aircraft.[167]
As Myola was threatened by the Japanese advance, the casualties gathered there had to be evacuated to the head of the track. The report of then Colonel Norris, the 7th Division's senior medical officer, noted the difficulty of providing sufficient means to move stretchers. Each required eight bearers which meant those wounded who were able to stagger were treated with "absolute ruthlessness" and not provided with stretchers. In one case, a casualty with a severely fractured patella (kneecap) walked for six days and some with worse injuries volunteered to walk to free a stretcher for the more seriously wounded.[168]
As the Australians advanced back along the track to Kokoda, Myola again became the main evacuation point. Aircraft were sent from Australia and approximately 40 patients were evacuated by air before a Ford Trimotor and a single-engined Stinson of unspecified model both crashed and further air evacuation from Myola was suspended.[169]
With the recapture of Kokoda, air landings and evacuation could occur from its landing strip and it became the main point of evacuation. As well as C–47s landing with supplies, Stinson L-1 hushyor light observation aircraft converted for use as air ambulances, flew into Kokoda.[20-yozuv] At the start of November, the detachment at Myola was caring for 438 sick and wounded. Many walked back along the track as they became sufficiently well to make the trek. Some had to wait up to two-and-a-half months before porters were available to carry the stretcher cases forward to Kokoda for evacuation by air. The last arrived at Port Moresby only a couple of days before Christmas.[21-yozuv] Norris later wrote and questioned: "why after three years of war no adequate ambulance planes were available"?[170]
Heavy weapons

Bullard reports that, while the munitions of the 144th Regiment were limited by what they could carry, this included eighteen [medium] machine guns (Type 92 Juki ),[22-qayd] three battalion (infantry) guns, two rapid-fire guns and two regimental artillery guns. The mountain artillery battalion deployed with three companies servicing a gun each, while leaving one gun in reserve at Buna. The 44th Regiment deployed with thirteen medium machine guns, three battalion guns, one regimental gun and one rapid-fire gun.[60] Anderson indicates that the regimental and mountain artillery battalion guns were of the 75 mm 41-toifa, while the infantry guns were of the 70 mm 92-toifa. By virtue that the 37 mm guns were described as "rapid fire", these were most likely the dual-purpose 94-toifa anti-tank gun which was a rapid-fire gun, as distinct from the earlier 11-turdagi 37 mm piyodalar qurollari.[171][23-qayd] It employed an automatic cartridge ejection and was capable of firing up to 30 rounds per minute. Primarily a direct-fire weapon, using telescopic sights, it had an effective range of 2,870 metres (3,140 yd) and could be broken down into four loads of 100 kilograms (220 lb). The Type 92 battalion gun was a 70 mm light howitzer capable of direct and indirect fire. It had an effective range of 2,800 metres (3,060 yd), firing a high-explosive projectile of 3.795 kilograms (8.37 lb).[24-qayd] The Type 41 was a mountain gun capable of firing a 5.8-kilogram (13 lb) high-explosive projectile to a maximum range of 7,000 metres (7,700 yd). It could be broken down into eleven units of not more than 95 kilograms (210 lb).[172]
The Australian brigade structure included a regiment of artillery, consisting of two batteries, each equipped with twelve Ordnance QF 25 asoschisi qurol. These had a range of 12,300 metres (13,400 yd) but weighed 1,800 kilograms (4,000 lb) and were not intended to be broken down into pack loads. As the Japanese advance threatened Imita Ridge the 14th Field Regiment (less one battery) deployed to near the head of the track to defend against a break-out by the Japanese into more open country. Two guns were hauled to Owers' Corner by caterpillar tractor. On 20 September, they shelled the Japanese positions at Ioribaiwa from a range of 10,000 metres (11,000 yd). A third gun was stripped down and man-handled forward, taking 50 men five days to move it just three kilometres (2 mi) through the mountainous jungle terrain. However, by time they were in position and ready to fire the Japanese were out of range.[173]

Vaziyatga javoban, 1-tog 'batareyasi was raised and equipped with 3.7-inch pack howitzers hastily obtained from the Yangi Zelandiya Qirollik floti. Initially it was intended that the guns would be moved by pack horse; however, following the unit's arrival in Port-Moresbi in early October it soon became clear that horses would be unsuited to the humid conditions in New Guinea with the guns to be moved by jiplar and native carriers instead.[174] It took about 90 porters to move one gun without ammunition.[175] The battery did not take part in the fighting along the track but on 15 November, a detachment with one gun was flown into Kokoda to support the Australian 7th Division.[176]
An Australian infantry battalion had a mortar platoon with four Ordnance ML 3-inch mortars, capable of throwing a 4.5 kilograms (9.9 lb) round 1,500 metres (1,600 yd).[177][25-qayd] Battalions also had access to the Vickers medium machine gun.[26-qayd] The Vickers, while water cooled, was of similar weight and capability to the Juki employed by the Japanese. When Australian forces deployed forward, neither of these weapons were carried. It was considered that they were too heavy to be carried and that they could not be effectively employed in jungle terrain.[179]
A post action report by the 2/14-batalyon identified that it was a mistake not to take these weapons forward.[180] By the time of the Battle of Brigade Hill–Mission Ridge (from about 6 September), the 21st Brigade was operating a section of three 3-inch mortars that had been parachuted into Myola.[181][27-yozuvlar] When the Australians commenced the advance from Imita Ridge, most battalions moving forward carried a 3-inch mortar with twenty-four bombs and one Vickers machine gun with 3,000 rounds.[182]
Despite this increased fire-power, the Japanese still held a significant advantage by quantity and range. McCarthy recounts instances where Australian mortars and Vickers machine guns brought into service were quickly targeted and taken out by Japanese artillery.[183] There was also a high rate of misfires with mortar ammunition that had been airdropped and, after such a round exploded in the barrel and killed the crew, the use of airdropped mortar ammunition was suspended by the 16th Brigade.[184][185]
The Japanese carried into the mountains thirteen artillery pieces and employed fifteen in the Battle of Oivi–Gorari at the end of the campaign.[186][187] While Anderson reports that approximately 940 men were responsible for carrying the guns, ammunition and other paraphernalia across the Owen Stanleys, he concludes that, despite this burden: "Throughout the Kokoda campaign the Japanese held one distinct advantage over the Australians: artillery. The Japanese use of artillery pieces in each Kokoda battle was a force multiplier, and the Australians were never able to match the Japanese ranged weapons." He attributes around 35 per cent of the Australian casualties to the Japanese artillery but observes that the effect upon morale was perhaps of equal significance: "The helplessness felt by the men who were subjected to relentless bombardment without the means to retaliate sapped both their number and their spirit."[186] Williams asserts that: "Japanese artillery provided an important, perhaps decisive, role on the battlefields of the Kokoda Track."[188]
Boshqa uskunalar

Australian soldiers initially entered battle wearing a khaki uniform which contrasted with the darker greens of the jungle. Moreover, webbing of the 21st Brigade had been bleached white from their service in Syria. In contrast, the Japanese wore a green uniform more suited to the jungle environment and were adept at camouflage. By the time the 25th Brigade was committed to the fighting, it was wearing jungle green—albeit that these were khaki uniforms that had been quickly dyed. This dye ran and caused skin complaints among the wearers.[189]
Much of the Australian equipment was standardised across the British army and the Commonwealth. This imperial legacy meant a force structure intended for fighting in open country and which was highly reliant on motor transport.[190] Consequently, weight was not so much a consideration where equipment was not intended to be man-packed. The 109 radio set and associated equipment required nineteen carriers to transport, were temperamental as a result of the "excessive handling" and were susceptible to moisture and humidity. In contrast, the Japanese used compact wireless sets and lightweight aluminium signal wire.[191][192]
Captured stocks of Mills bombs (model 36M) were valued by the Japanese. The lever and striker mechanism of the Mills bomb was considered superior to their own service grenade, the 99 yozing, which had to be struck on a hard object to ignite the fuze immediately before throwing.[193]
Havo operatsiyalari

Apart from the significant logistical contribution in support of the Australian forces, air operations included bombing missions against Rabaul, the Japanese base supporting the landings in Papua, and the attempts to resupply and reinforce the beachheads around Buna and Gona. Bombers were based in Australia, staging through Port Moresby—resulting in considerable crew fatigue.[194][195]
Bombing sorties also targeted the beachheads, particularly the airfield being constructed at Buna, and the Japanese line of communication. Regular missions against Buna effectively neutralised the airfield—damaging it almost as fast as it could be repaired, thereby rendering it ineffective. The crossing of the Kumusi at Wairopi was regularly targeted and bridging works repeatedly destroyed.[196][197] The Australian forces on the track called for bombing and strafing missions in support of operations on several occasions but such requests were not always fulfilled. Weather conditions across the range constantly interfered with operations.[198]
Ittifoq qo'mondoni

MacArthur, after being ordered to leave the Philippines, arrived in Australia on 17 March 1942 and was appointed Supreme Commander of Allied Forces in the South West Pacific Area (SWPA).[199] MacArthur had to compete with Admiral Chester Nimits 's plan to drive towards Japan through the central Pacific. Ambitious, he was concerned that his command should not be sidelined.[200][201] Blamey had been recalled from the Middle East, arriving in Australia on 23 March 1942. Shortly after, he was appointed as commander-in-chief of the Australian Army and subsequently, to the separate position, which he simultaneously held, of commander, allied land forces SWPA.[202]
Papua and New Guinea had been the Australian 8th Military District under command of Morris. On 9 April 1942, it was formed into New Guinea Force, with Morris promoted major general.[203] As events escalated and the forces involved increased, Rowell arrived from Australia with HQ I Corps, taking command of the force on 12 August 1942. Morris was moved to command the Avstraliya Yangi Gvineya ma'muriy birligi (ANGAU). At about this time, 7th Division was deploying to New Guinea and responsibility for the immediate defence of Port Moresby, including Maroubra Force and the Kokoda Track operation was devolved to divisional headquarters under Allan.[204][28-yozuvlar]
Both Blamey's Allied Land Headquarters (LHQ) and MacArthur's General Headquarters (GHQ) were increasingly alarmed by the situation on the track, with Australian forces suffering a series of reversals, and by the Japanese landings at Milne Bay (this battle was fought from 25 August to 7 September 1942). Vasey, then Blamey's deputy chief of the general staff, wrote privately to Rowell on 1 September, that "GHQ is like a bloody barometer in a cyclone—up and down every two minutes".[206] MacArthur also had a poor opinion of the Australian troops and no real appreciation of the conditions under which the fighting in New Guinea was being conducted. On 6 September, MacArthur wrote to General Jorj Marshal that, "the Australians have proven themselves unable to match the enemy in jungle fighting. Aggressive leadership is lacking."[207] Jones observes, "The attitude that the Australians were poor fighters pervaded thinking at MacArthur's headquarters".[208]

The Australian government was also concerned. On 9 September, Army Minister Frank Ford directed Blamey to visit Port Moresby, which he did, from 12 to 14 September. On his return, he was able to assure the government of his confidence in Rowell and that the situation was in hand.[209] Nonetheless, MacArthur persuaded the Australian Prime Minister, John Curtin, to send Blamey to New Guinea to take command there and "energise the situation".[210] By this manoeuvre, MacArthur ensured that Blamey would be the scapegoat if Port Moresby fell.[211]
MacArthur visited Port Moresby briefly from 2 October. On 3 October, he went as far forward as Owers' Corner, where he spent about an hour. He was present as the 16th Brigade, under Brigadier Jon Lloyd, was commencing its advance along the track.[212] He subsequently established his advance headquarters in Port Moresby on 6 November 1942 (just after Kokoda was reoccupied) until January 1943.[213]
Command crisis
The "command crisis" is referred to by McCarthy (among others) in the Australian official history as part of a chapter title: "Ioriabiawa: and a command in crisis".[214][215] Academic and historian, Devid Xorner 's first book is titled, Buyruq inqirozi: Avstraliya generalligi va yapon tahdidi, 1941–1943, in which he studies the generalship in these early stages of the war with Japan.[216] Anderson notes that, while the "command crisis" specifically relates to Blamey's sacking of Rowell, the phrase can also be applied to the sackings of Allen and Potts.[217]
Rowell

Complying with Curtin's directive, albeit reluctantly, Blamey arrived in Port Moresby on 23 September 1942 with only a small personal staff. It was a situation which Blamey felt was quite reasonable but with which Rowell saw significant difficulties. Rowell's objections were that the circumstances of Blamey's presence in his headquarters would ultimately undermine the good conduct of its operation by forcing it to serve two masters.[218] McCarthy's reporting of the initial situation suggests that Blamey, while maintaining his position, was conciliatory and empathetic toward Rowell's concerns.[219] Allen recounts that Rowell's objection was not to Blamey using his headquarters as much as the expectation that he (Rowell) was expected to be Blamey's chief-of-staff.[220] Horner observes that this was much how the headquarters subsequently operated under Herring.[221] Underpinning the events that followed was bad blood between them stemming from Blamey's conduct in the Middle East and Greece.[222][223] Perhaps, more importantly, there was a sense of disappointment in Blamey's lack of support by way of resolve to oppose the decision to send Blamey to New Guinea. In at letter to Major General Kiril Klouz at Milne Bay, Rowell said on this, "Either I am fit to command the show or I am not."[224]
While the situation continued to simmer, it came to a head after Blamey had visited Milne Bay on 25 September at MacArthur's suggestion and ordered Clowes to send a force by air to Vanigela.[225] General-mayor Jorj Kenni noted that Rowell was "not even consulted anymore".[226] Rowell confronted Blamey on the issue and was relieved of command on 28 September. In a communication to Curtin, Blamey referred to Rowell as insubordinate and obstructive.[227][228] Rouell o'rnini general-leytenant egalladi Edmund Herring.[229]
Allen
On 9 September 1942, Allen's command responsibilities were narrowed to the direct prosecution of the Kokoda Track campaign and flank protection.[29-yozuvlar] Important to subsequent events, NGF retained control of aerial resupply.[231] The Australian advance commenced with the attack of 28 September against the (abandoned) Japanese positions on Ioribaiwa Ridge. The 16th Brigade commenced to advance forward on 3 October.[232]

Allen had advanced his headquarters to Menari by 11 October. The 25th Brigade was advancing on two tracks from Efogi, toward Templeton's Crossing. He was mindful of the need to keep his troops fresh enough to fight and of the supply problems imposed by operations over the track. There were already difficulties in air drops meeting the division's needs. These concerns were expressed to Herring on 7 October, including the need to create a reserve over and above the daily needs. As a consequence, the supply programme intensified.[233][234]
On 5 October, Blamey wrote to MacArthur in "hard terms" of the logistical difficulties faced by NGF and specifically, Allen.[235] Despite this, Blamey and MacArthur pressured Allen to increase his rate of advance and Blamey forced the issue by only arranging for supplies to be dropped at Myola—effectively forcing Allen to advance to meet his point of supply.[236][237] Anderson discusses this and identifies it as an "extremely risky" strategy. Blamey (and Herring) wanted Allen to maintain pressure on the retreating Japanese and push home the advantage. Dropping supplies forward maintains the momentum of advance but this quickly breaks down if the advance is stalled and there are limited reserves. The position of Blamey was premised on the proposition that the Japanese were an enemy in retreat. In fact, they had made a clean break from Ioriabiawa and had established defences that were blocking Allen's advance on both routes to Templeton's Crossing. With supplies dropped at Myola, Allen could not easily support the advance being made along the Mount Bellamy track and, until the position forward of Templeton' Crossing was secured, there was the risk of Myola being compromised.[238]
On 17 October, Allen, now at Myola, received the following message from Blamey:
General MacArthur considers quote extremely light casualties indicate no serious effort yet made to displace enemy unquote. You will attack enemy with energy and all possible speed at each point of resistance. Essential that Kokoda airfield be taken at earliest. Apparent enemy gaining time by delaying you with inferior strength.[239]
Allen's response was measured. He requested that any decision on his progress be deferred until a report could be made by a liaison officer or more senior officer.[30-yozuvlar][240] MacArthur and Blamey continued to press Allen through the delays experienced at Templeton's Crossing and Eora Village. To his credit, Allen stood by his subordinates. Just as the 16th Brigade was advancing on Eora Village, a signal from MacArthur through Blamey on 21 October further pressured Allen: "Operations reports show that progress on the trail is NOT repeat NOT satisfactory. The tactical handling of our troops in my opinion is faulty." Allen replied, in part: "I have complete confidence in my brigade commanders and troops and feel that they could not have done better."[241] Allen's trust may have been misplaced though, as Anderson describes Lloyd as having "botched" the tactical handling of the first two days of the engagement at Eora Village that were just then unfolding. He also notes that the downward pressure being applied for haste likely weighed heavily in Lloyd's decision to proceed initially with a frontal attack. The pressure for more haste thereby contributed to increasing the delays.[242] On 28 October, Blamey ordered Allen's recall and replacement by Vasey.[243] Allen had vouched for the judgement and professionalism of his brigade commanders (in this case, specifically Lloyd) and in this, he was ultimately responsible; however, Anderson opines that Allen's replacement may have been inevitable, regardless of the justification.[244]
Potts

Potts had been sent forward to Isurava with orders to attack and recapture Kokoda. Instead, his force was unable to withstand the Japanese attacks and he was forced to conduct a fighting withdrawal, suffering a disastrous defeat at Brigade Hill. Increasingly concerned, MacArthur applied pressure to the chain-of-command.[245] Potts was recalled to Port Moresby by Rowell on 10 September, with Porter as his replacement.[206] Horner reports Rowell's motive as dissatisfaction with Potts' "mishandling" of his brigade and a need to obtain a first-hand account of conditions.[246] Anderson reports Allen agreed with the decision, judging that Potts was "either tired or losing a grip of the situation".[247] On arriving at Port Moresby, Potts was interviewed by Rowell and Allen, whereupon, satisfied with his performance, he was returned to command his brigade.
However, in a private interview (overheard by Potts' staff captain, Ken Murdoch) on 22 October, the day of the "running rabbit" address, Blamey told Potts he was no longer required in New Guinea: "Failures like the Kokoda Trail ... could not be tolerated—the men had shown that something was lacking ..[and he] blamed the leaders."[248][31-qayd] Potts was transferred to command the 23-brigada reforming in Darwin, exchanging postings with Brigadier Ivan Dugherti. Herring has claimed that the decision was his—feeling that Potts needed to be rested and wanting Dougherty to take the position.[249] Murdoch was inundated with resignation papers from officers affronted by Potts' treatment. Potts Merdokga barcha iste'folarni rad etishni buyurdi.[250]
"Yugurayotgan quyonlar" hodisasi
On 22 October, after the relief of the 21st Brigade by the 25th Brigade, Blamey visited Koitaki, near Port Moresby, where the 21st Brigade was encamped. Shortly after relieving Potts, Blamey addressed the men of the 21st Brigade on a parad maydonchasi. The men of the Maroubra Force expected congratulations for their efforts in holding back the Japanese. Instead of praising them, Blamey told the brigade that they had been "beaten" by inferior forces, and that "no soldier should be afraid to die". "Remember," Blamey was reported as saying, "it's the rabbit who runs who gets shot, not the man holding the gun."[251] There was a wave of murmurs and restlessness among the soldiers. Officers and senior unts-ofitserlar (NCOs) managed to quiet the soldiers and many later said that Blamey was lucky to escape with his life. During the march-past, many disobeyed the "eyes right" order.[251] In a later letter to his wife, an enraged Brigadier Potts swore to "fry his [Blamey's] soul in the afterlife" over this incident. According to witnesses, when Blamey subsequently visited Australian wounded in the camp hospital, inmates nibbled lettuce, while wrinkling their noses and whispering "run, rabbit, run " (the chorus of a popular song during the war).[251]
Tahlil

Historian Peter Dean acknowledges the general interpretation that the actions of MacArthur and Blamey were "to salvage their own positions at the expense of the troops"[252] but reports that MacArthur, himself, was under pressure, citing a cable from the US Joint Chiefs to MacArthur of 16 October, "reminding him that they viewed the situation in Papua as 'critical'".[253] Dean also notes that this coincided with the relief of Vice Admiral Robert Ghormley, Commander-in-Chief of US forces in the south Pacific who had operational control of the forces engaged at Guadalcanal.[253] The pressure brought to bear by MacArthur was in the face of "complicated operational and strategic contexts", stating that, "an understanding of these contexts has been poorly done in most accounts of the fighting [in Papua]."[252] This is encapsulated in correspondence from Brigadier General Stiven J. Chamberlin (MacArthur's operations chief) to MacArthur's Chief-of-Staff, Richard K. Sutherland, of 30 October 1942: "the key to our plan of action lies in the success or failure of the South Pacific in holding Guadalcanal ..." (that is, that the position at Guadalcanal was tenuous).[254]
However, with specific reference to Allen, Horner finds, "MacArthur showed an abysmal lack of trust in his subordinate [Blamey and his view that Allen was doing all he could], and an unwarranted interference in the tactical handling of troops some 1,500 miles from his headquarters."[255] While the Curtin government was largely steadfast in recalling the 2nd AIF from the Middle East to Australia against considerable opposition from Churchill,[256][notes 32] Horner observes the government's complete dependence on MacArthur, which compromised Blamey's relationship with it.[257] His analysis also observes that these events were underpinned by the logistical problems faced by the NGF on the track and elsewhere.[258]
Horner's criticism of Blamey in sacking Allen is that he was in no position to accurately assess Allen's performance, observing that if Vasey could be flown into Myola to relieve Allen, then an assessment could have been arranged using the same means. Blamey acted to placate MacArthur because he (Blamey) was unwilling to risk his own job. Blamey had demonstrated "a remarkable lack of loyalty" toward his subordinate. To some degree, Herring shares in this criticism.[259] Biroq Uilyams, Allenning oldinga siljishi kutilganidan ancha sekinroq bo'lganini va unga nisbatan bildirilgan va ishdan bo'shatilishiga olib kelayotgan tanqidlar oqilona asosli ekanligini kuzatmoqda.[260]
Horner Rouellni kuzatadi, uning yagona muvaffaqiyatsizligi Blamey bilan ishlay olmaslik edi va Blamey bunda aybdorroq edi, u o'z mavqeini xavf ostiga qo'yishni xohlamadi. U bo'ysunuvchisiga ko'proq ishonch va sadoqat ko'rsatishi kerak edi; Makarturning manevrasini inkor etdi va vaziyatdan qochdi.[261]
Qabul qilingan asoslardan qat'i nazar, ishdan bo'shatishlar shubha, adovat, shaxsiy raqobat va "toksik muhit" muhitini yaratdi, ular yuqori darajalarni qamrab oldi va urush harakatlariga zarar etkazdi.[217] Xornerning ta'kidlashicha, Blamey "o'z pozitsiyasini saqlab qolish va avstraliyalik qo'mondonlarni himoya qilish, o'z o'rnini bosish va bo'ysunuvchilariga ishonchsizlikni xavf ostiga qo'yish" o'rtasida xavfli chiziqni bosib o'tgan.[262] Xornerning ta'kidlashicha, "generallar va siyosatchilar o'rtasidagi tortishuvlar unchalik natija bermasligi mumkin. Ammo buning aksi. Makkur va Blamey kabi odamlarning xatolari Yangi Gvineyada yaqin falokatga olib keldi. Odatdagidek aynan shu odamlar eng og'ir narxni to'lagan front. "[263]
Birinchi bosqich - Yaponiyaning avansi
Yaponiya qo'nish va dastlabki avans

Yaponiyaning Gona qo'nish joyi 1942 yil 21-iyul soat 17:30 da boshlandi. Ularga ittifoqchilar havo hujumlari bilan zulmat tushguncha va ertalab yana bitta transport kemasini yo'qotish uchun qarshi turishdi.[264] Yaponlarning qo'nish joylarini PIB patrullari va ANGAU zobitlari kuzatdilar. Templeton ikkita vzvodini oldinga olib chiqdi. Uning qolgan vzvodi Kokodani himoya qilish edi. Birinchi aloqa 23 iyul kuni soat 16.00 atrofida amalga oshirildi. Leytenant Chalk boshchiligidagi PIB patrul avaliga yaqinlashib kelayotgan yaponlarga pistirma qildi.[265][266] Wairopi-dagi Kumusi daryosi orqali o'tadigan ko'prik chekinayotgan avstraliyaliklar tomonidan vayron qilingan va yaponlar o'tish joyidan o'tayotganda ularni ta'qib qilishgan.[267][116]
Ouen 24 iyulda Kokodaga uchib ketgan va vaziyatni baholash uchun Templeton bilan oldinga borgan. Keyin Ouen Kokodaga qaytib keldi va qo'shimcha kuchlarni qo'nishga chaqirdi. Gorari shahridan 700 metr sharqda (800 yd) sharqda pistirma joylashtirilgan va 25 iyul kuni kunduzi boshlangan. Keyin ikkita vzvodning kuchi va qolgan PIB shu kuni kechqurun pozitsiyani egallab, Oiviga yo'l oldi. D kompaniyasining 16 ta vzvodi Kokoda aeroporti bilan 26 iyulda ikkita reysda etib keldi. Birinchi reys ertalab soat 10:00 da etib kelgan. Ular darhol oldinga jo'natildi va Yaponiya hujumidan oldin soat 15: 00da Oividagi kuchlarga qo'shilishdi. Kuch ikkinchi darajali lavozimda nafaqaga chiqishga majbur bo'lgunga qadar yaponlarni bir muddat ushlab tura oldi. Yaponlar ushbu pozitsiyani o'rab olishga urinishganida, Templeton hali kelmagan ikkinchi parvozdan xavotirda edi va uni ogohlantirish uchun yo'l oldi. U ketgandan ko'p o'tmay olov otilib chiqdi. Templeton boshqa hech qachon ko'rilmagan.[268][33-yozuvlar]
Vatson buyruq oldi. Qabul qilish kuchiga tobora ko'proq tahdid solayotgani sababli, u Deniki tomon burildi. Kokodada Ouen o'zining oldinga otirgan vzvodlari bilan aloqani uzib qo'ydi va shuningdek, Denikiga yo'l oldi, 27 iyul soat 11:00 da jo'nadi. Ertasi kuni ertalab sayr qiluvchilarning kichik bir partiyasi keldi. Oldingi tunni Kokoda o'tkazib, ular qishloqning egasizligi haqida xabar berishdi. Denikidagi ikkita uchastkadan chiqib, Ouen tezda qishloqqa qaytib ketdi.[270][271]
Kokoda jangi
Ertalab soat 11: 30ga kelib, Ouen Kokodani B kompaniyasidan, qolgan PIBdan va Maroubra Force-ga qo'shilgan ANGAU a'zolaridan iborat kuch bilan qayta ishg'ol qildi, ularning soni 80 dan 148 gacha bo'lgan.[272][273][34-yozuvlar] Ouen qo'shimcha kuchlarni chaqirdi va ko'p o'tmay tepada ikkita samolyot paydo bo'ldi, ammo himoyachilar aeroport bo'ylab qo'yilgan to'siqlarni olib tashlashda sust edilar va uchuvchilar vaziyatni qo'nish juda xavfli deb hisobladilar.[140] Ushbu voqea haqidagi turli xil ma'lumotlarda nomuvofiqliklar mavjud - eng muhimi, bu 28 iyulda yoki bir kun oldin, Ouen Kokodani tark etmoqchi bo'lganida sodir bo'lgan.[35-yozuvlar]

Kokoda platosi til shaklida, yonboshlari qiyalikka ega. Hukumat stantsiyasi uning shimoliy uchida joylashgan. Oividan kelgan yo'l sharqdan uchiga yaqinlashadi. Deniki tomon yo'l uning markazidan janubga qarab yuradi. Ouen o'z kuchini stantsiya atrofida uning uchiga joylashtirdi. Soat 13:30 da taxminan 200 nafarni tashkil etadigan yapon kuchlarining oldingi elementlari[285] ko'rilgan. Yaponiya qo'mondoni, kapitan Ogava o'z kuchini yig'ishda, avstraliyalik himoyachilar tuni bilan ta'qib qilinishdi, shu jumladan olov engil ohaklar va a 92-taburli qurol Bu, ayniqsa, avstraliyaliklarning bunga javob berishga imkoni yo'qligi bilan bog'liq edi. Asosiy hujum 29-iyul kuni erta tongda soat 2:30 da boshlandi. Ouen o'z qo'shinlariga ilhom berish uchun oldinga siljishlarda edi va o'ng ko'zining ustida o'lik o'qni oldi. Uotson qo'mondonlikni o'z zimmasiga oldi va kuch haddan oshib ketayotganda Denikiga qaytib ketdi.[286][273]
Kokodadagi birinchi jangdan so'ng, yapon va avstraliyaliklar keyingi bosqichga kuchlarini jamlagan janglarda qisqa pauza bo'lgan. Yaponlar uchun bu 144-piyoda polkining 1-batalyoni bo'lib, uning birinchi rokasi Kokoda B kompaniyasiga duch kelgan. Batalyonga podpolkovnik Tsukamoto Xatsuo boshchilik qilgan. 30-va 31-iyul kunlari Deniki shahriga 39-batalyonning "C" va "A" kompaniyalari etib kelishdi.[287] 30-brigadaning brigada mayori mayor Allan Kemeron 4 avgust kuni etib kelgan Maroubra Force qo'mondonligini qabul qilish uchun jo'natilgan edi.[288] Kameron oldinga siljiganida yo'l bo'ylab janub tomon harakatlanayotgan qo'shinlarga duch kelgandan so'ng, B Kompaniyasi haqida past fikr bildirdi.[289] Kemeronning kelishi trekning boshidan Denikiga qadar telefon aloqasi o'rnatilayotgan paytga to'g'ri keldi. Bu Port Moresbi bilan aloqani ancha yaxshiladi.[85] D kompaniyasi 6 avgustda keldi.[160] Ushbu kuch bilan Kemeron qarshi hujumga o'tishga va Kokodani qaytarib olishga qaror qildi. Uning rejasi Deniki xavfsizligini ta'minlovchi B kompaniyasi bilan har bir yangi kompaniyasiga berilgan uchta yo'nalish bo'ylab harakatlanish edi. C kompaniyasi asosiy yo'l bo'ylab Kokodaga borishi kerak edi. Kapitan Noel Symington boshchiligidagi kompaniya yaponlarga noma'lum bo'lgan sharq tomon parallel yo'l bo'ylab yurishi kerak edi. D kompaniyasi Denikidan Piriviga boradigan yo'lda yurishi kerak edi. Pirivi Oivi-Kokoda trassasining janubida va Kokodadan 5 km sharqda joylashgan. U erda to'siqni egallash kerak edi.[290][291]
Yakuniy buyruqlar Kameron tomonidan 7 avgust kuni tushdan keyin, ertasi kuni ertalab forma yig'ish punktlariga o'tish va peshin vaqtida hujum uchun berildi. Kameronning kuchi 550 kishidan iborat bo'lib, ularning soni 430 kishini tashkil qildi. Bunga 1/144 batalyonning 522 kishisi va 660 kishilik qo'shin, shu jumladan artilleriya vzvodi va jangovar muhandislar qarshi chiqdilar.[104] Tsukamoto o'sha kuni asosiy yo'l bo'ylab Deniki tomon hujum qilishni tanladi va C Company qariyb 200 metr (200 yd) ilgarilab qarshilikka duch keldi.[292]

Kokodaga hujum oldin o'n oltita P – 39 tomonidan bombardimon qilingan va qurollangan. Symington Kokodaga kirib bordi va minimal qarshilikka duch kelib, uni egallab oldi. Kapital Sanopa bilan Kemeronga qishloqni ushlab turish uchun havo yo'li va qo'shimcha kuch bilan to'ldirishni talab qilgan xabar yuborildi. C kompaniyasi asosiy yo'lda ilgarilab, Tsukamotoning asosiy kuchiga kelganda qarshilik kuchayib bordi. Oldinga borolmay, Yaponiyani diqqat bilan kuzatib borgan holda Denikiga chekindi. U erga soat 17:50 da etib kelgan. Kapitan Maks Bidstrup boshchiligidagi D kompaniyasi Oivi-Kokoda trassasidagi kavşakta o'rnini egallab turib, har ikki tomon muhandislari tomonidan kuchli hujumga uchradi. Kokodaga qilingan hujumni ko'rib chiqishda muvaffaqiyatsizlikka uchragan edi, u soat 16: 30da asosiy kuchi bilan Denikiga qaytib ketdi va 9 avgust kuni soat 13:30 atrofida etib keldi (jangda yakkalanib qolgan 17 ta Platon bilan ertasi kuni etib keldi) ).[293][294]
Sanopa 9 avgust kuni ertalab Symingtonning xabari bilan keldi. Kemeron Kokodadagi vaziyatni aniqlash uchun havodan etkazib berishni va havodan razvedka qilishni talab qildi. Unga xabar berishicha, keyingi kunga qadar etkazib berish mumkin emas. Tsukamoto 9 avgust kuni soat 11: 30da etib kelgan kompaniyani Kokodaga qaytarib yuborgan edi. Qayta ta'minlanmasdan va qat'iyatli hujumlarga duch kelmasdan, Symingtonning kuchlari 10 avgust kuni soat 19:00 gacha ushlab turildi. Keyin u g'arbga qarab 13 avgustga etib boradigan Isuravaga qaytib ketuvchi yo'l bilan qaytdi.[295][296] Razvedka parvozi 10 avgust kuni ertalab sodir bo'lgan, ammo va'da qilingan qayta to'ldirish ob-havo tufayli 12-avgustga qoldirilgan va u yaponlarning qo'liga o'tgan.[297][298][299]
39-batalyonning pulemyot rota[36-yozuvlar] trek bo'ylab (o'rtacha pulemyotlardan kamroq) joylashtirilgan va taxminan bir hafta davomida Isuravada pozitsiyani egallagan. Kemeron buni oldinga chaqirdi, 12 avgust kuni soat 17:00 da Denikiga etib bordi va u B kompaniyasi bilan rollarni almashdi. Denikidan kelgan patrullar yaponlarning oldinga siljishgani haqida xabar berishgan ommaviy ravishda Kokodadan. Ularning hujumi 13 avgust kuni ertalab soat 5:30 da boshlanib, kun bo'yi davom etdi. Kechaning ko'p qismida sportchil otishmalar davom etdi va hujum ertasi kuni ertalab yangitdan yangradi. Yaponlar uning qanotlari va orqa tomoniga tahdid qilar ekan, Kemeron Isuravaga ertalab soat 9:50 da chekinishni buyurdi.[301][302]
Isurava jangi
Tsukamoto avansni bosishni davom ettirmadi, ammo Xorining asosiy kuchini jamlashini kutib, Kokodani ushlab turgan avstraliyalik kuchlar soni 1000 atrofida bo'lganini taxmin qildi,[303] 1200 gacha.[273][304] Xori uchun mavjud bo'lgan kuch 3000 dan 5000 gacha kuchli bo'lgan qurol-yarog 'va xizmatlarga ega bo'lgan beshta piyoda batalyonlariga asoslangan edi.[305][306] Xori to'rtta piyoda batalyoni bilan hujum qilishni rejalashtirgan, natijada ulardan birini zaxirada ushlab turishgan. Isuravada avstraliyaliklarni jalb qilgan kuch, artilleriya bilan birga 2130 kishini tashkil etdi.[307]
16-avgust kuni podpolkovnik Ralf Xonner 39-batalyonni boshqarish uchun Isuravaga etib keldi. Shuningdek, u Maroubra Force qo'mondonligini o'z zimmasiga oldi va shu vaqtgacha Isuravadan taxminan 2 kilometr (2200 yd) janubda Alola shahriga etib kelgan 53-batalyonning birinchi rota tarkibiga kirdi. 19 avgust kuni 30-brigada shtab-kvartirasi bilan kelganida buyruq Porterga o'tdi.[308] 21-brigadaning ikkita batalyoni bo'lgan Potts ham oldinga siljiydi, ammo Myola-da etkazib berishning etarli emasligi sababli ularning harakatlari "muhim vaqtda" kechiktirildi.[309] Potts 23 avgust kuni qo'shma kuchlar qo'mondonligini o'z zimmasiga oldi va Kokoda tomon hujum qilishni buyurdi va uning ta'minotidagi qiyinchiliklarni engillashtirish uchun 39-bataloni ozod qilish niyatida.[310][311] U boshqargan Avstraliya kuchi 2290 kishini tashkil etdi.[306][312]
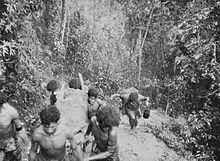
39-batalyon tomonidan ishg'ol qilingan Isuravadagi mavqe g'arbiy tomondan daraga o'xshash Eora daryosiga oqib tushgan kichik ariqlar bilan old va orqa tomonlarni chegaralagan; g'arbga ko'tarilgan tik chiziqli chiziq bilan. Eora Creek bilan chegaralangan asosiy tizmalar shimoldan janubga qarab yurgan. Isurava pozitsiyasi va asosiy trassasi "Isurava tizmasi" yoki Eora Creek g'arbiy tomonida edi. Parallel yo'l "Abuari tizmasi" tomonidan yoki Eora Krikining g'arbiy tomoni bo'ylab o'tdi. Keyinchalik Xonner bu haqda quyidagilarni aytib berdi: "asosiy yo'lda kechikish holati qanchalik yaxshi bo'lsa".[313] Biroq, bu pozitsiya shimolda joylashgan (manbalarda tog 'tizmasi deb nomlangan) chiziqni e'tibordan chetda qoldirdi, bu esa yaponiyaliklarga Avstraliyaning pozitsiyasini yoqib yuborishi mumkin bo'lgan pozitsiyani taqdim etdi.[314] 53-batalyonning asosiy kuchi Alola shahrida joylashgan, ammo g'arbiy qanotda Abuari yo'lini himoya qilish vazifasi yuklangan.[315][316]
Oldinga joylashish va har ikki yo'lda patrul xizmati bilan 26 avgust kuni bog'lanishgan. 39-batalyon pozitsiyalari artilleriya o'qiga tutildi, 2/14-batalyon ularni egallash uchun harakat qilayotganda. Keyin 39-batalyon o'zlarining orqa qismiga o'tdilar.[317][318] 53-batalyon sharqiy qanotni va Abuari tizmasi bo'ylab yaqinlashishni himoya qilgan. 26 va 27 avgust kunlari u erdagi mavqe tobora noaniq bo'lib qoldi. 53-batalyonning forvardlari qat'iyatli harakat qilolmadilar, batalonning qo'mondonlik partiyasi to'g'ridan-to'g'ri qo'mondonlikni olish uchun oldinga intilib, podpolkovnik Kennet Vard halok bo'ldi.[315] The 2/16-batalyon Myola yaqinidan chaqirilgan[319] sharqiy qanotdagi pozitsiyani yuqoriga ko'tarish.[320]
27 avgustdan boshlab, Yaponiya hujumlari har ikkala yondashuvda ham intensivligini oshirdi.[321] Abuari yo'lida 2/16-batalyonning ikkita kompaniyasi tomonidan kuchaytirilishi ushbu o'qda 2/144-batalionning oldinga siljishini ushlab turishga muvaffaq bo'ldi. Keyinchalik yapon manbalari ta'kidlashlaricha, o'ng tarafdagi 53 va 2/16-chi mudofaa ularga "tezkor ekspluatatsiya qilish uchun ozgina imkoniyat" taqdim etdi.[322] garchi, Yaponiya qo'mondoni u erda o'zining ustunligini ishlatmagani uchun tanqid qilingan,[321] aftidan u yanada kuchli tutilgan degan ishonch ostida.[323]
Isuravaga yaqinlashganda, 2/14 va 39-chi batalyonlar Yaponiyaning xujumlari tomonidan kuchayib borayotgan bosimga duchor bo'lib, yakka tartibda janglar bilan yakunlandi. Bryus Kingsbury vafotidan keyin Viktoriya Xochi bilan taqdirlandi. Guvohlarning so'zlariga ko'ra, Kingsberining xatti-harakatlari yaponlarga katta ta'sir ko'rsatgan va ularning tezlashishini vaqtincha to'xtatgan.[324] Uning iqtibosida qisman o'qilgan:
Xususiy Kingsberi, a-dan omon qolganlarning bir nechtasi bo'lgan vzvod bosib olingan ... zudlik bilan qarshi hujumga buyurilgan boshqa bir vzvod tarkibiga qo'shilishga ixtiyoriy ravishda qo'shildi. U oldinga yugurib, o'qni o'qqa tutdi Bren qurol kestirib, dahshatli pulemyot olovidan o'tib, dushman orqali yo'lni tozalashga muvaffaq bo'ldi. O'zining olovi bilan dushman pozitsiyalarini supurishni davom ettirib, ularga juda ko'p sonli talofat etkazgan Xususiy Kingsberi erdan yiqilib tushdi va o'qdan otib o'ldirildi. mergan o'rmonda yashirinish.[325]

Bu vaqt ichida yaponlar Isurava pozitsiyasiga o't qo'yishga muvaffaq bo'lishdi. Aksariyat hisobotlarga ko'ra, bu avtomat, [o'rta yoki og'ir] minomyot va artilleriya qurollaridan kelib chiqqan.[326][321] Uilyamsdagi voqea shuni ko'rsatadiki, minomyotlar noto'g'ri aniqlangan - buning o'rniga uni faqat artilleriya bilan bog'liq. Uilyams sakkizta artilleriya qurollari haqida xabar beradi: oltita artilleriya pulemyotlari va pulemyot olovi dam olish uyiga tushgan (keyinroq). Qolgan ikkitasi daraning 2/144-sharqini va 1/144-chisini qo'llab-quvvatlash uchun tarqalib ketishdi.[327] Avstraliyaliklar 27 avgustda kelgan 39-batalyonning bitta 3 dyuymli o'rta ohak bilan javob berishga qodir edi, ular Myola-da havoga ko'tarilgandan keyin 2 / 14da tarbiyalangan.[328][329]
G'arbiy qanotning tahdidi bilan, Isuravadagi Avstraliya kuchlari Isurava dam olish maskaniga (Isurava va Alola o'rtasida) 29-avgust kuni kech soatlarda qaytib ketishdi.[330] 30 avgustda 3/144-chi g'arbiy qanotdan hujumga o'tib, Alola tomon yo'nalishni kesib tashladi. Hujum oldidan Yaponiya tog 'artilleriyasi tomonidan kuchli yong'in sodir bo'ldi.[331] Soat 15: 00da Potts Eora qishlog'iga olib chiqishni buyurdi.[332] Maroubra Force-ning ko'plab a'zolari, shu jumladan podpolkovnik Artur Key, ajralib chiqdi va keyinchalik qo'lga olindi va o'ldirildi.[333] Operatsiyadan keyingi hisobotida Potts ta'kidladi: "Hech qachon 2/14 va 2/16 avstraliyalik piyoda batalyonlari hech qachon buzilmagan va kelishilgan operatsiya uchun to'liq va faqat etkazib berish bilan bog'liq kechikishlar tufayli mavjud edi".[334]
Eora Creek - Templetonning o'tish joyi
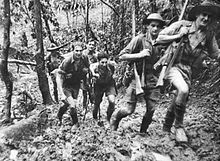
Isurava shahridagi jangdan voz kechgan Potts ta'qib etayotgan yaponlar tomonidan jangovar chekinishni amalga oshirishga majbur bo'ldi. Milne ko'rfazidagi vaziyat barqarorlashgach, Allen 21-brigadaning qolgan qismiga qo'shilish uchun 2/27 batalyonni qo'yib yubordi. Yo'l bo'ylab 30 avgustda jo'nab ketish, oldinga etib borish uchun bir necha kun kerak bo'ladi va kampaniyaning ushbu bosqichiga hech qanday ta'sir ko'rsatmaydi.[335] Jang paytida Horii mayor Mitsuo Koiwai boshchiligida 2/41-ni qilishga qaror qildi,[336] g'arbda keng yoyni olib borish va Alolaning janubidagi yo'lda chiqish maqsadida. Ular adashib qolishdi va aslida jangdan keyin ham bitta o'q uzmasdan asosiy yapon kuchlari bilan aloqani tikladilar.[306] Endi Xori batalonni avangardga tayinlab, chiqib ketayotgan Marubra kuchlarini ta'qib qildi.[337]
Dastlabki chekinishda 2/16-chi batalyon skrining rolini o'ynab, Alolaning orqasidan Eora qishlog'iga qarab bosqichma-bosqich chiqib ketdi, qishloqning o'zi esa 39-batalyonning qolgan qismiga tegishli edi. Maroubra Force-ning aksariyati o'z pozitsiyalaridan chiqib ketganligi sababli, 2/16-batalyon keyinchalik Eora qishlog'ida iste'foga chiqdi va 1 sentyabr kuni tushga yaqin keldi. So'ngra soyning janubiy tomonidagi o'tish joyi va qishloqqa e'tibor bermaydigan kalli shpalda mudofaa pozitsiyasini egalladi. 2/14-batalyon trassa bo'ylab taxminan 1 kilometr (1100 yd) janubda edi.[338] 39-batalyon, keyinchalik ularning soni 150 kishidan kam bo'lib, Kagiga borishni va u erda ushlab turishni buyurdi. 5 sentyabrda qaytarib olinmaguncha oldinga qarab turdi.[339][340] 31-avgust kuni ertalab 53-batalyon jangdan chiqarilib, Myolaga qaytib borishga buyruq berildi, u erda batalyonning bir qismi ishchi partiyalar bilan ta'minlandi.[341]
Eora qishlog'idan boshlab, 2/16 batalyon trek bo'ylab kechikkan pozitsiyalarni egallab oldi: 2 sentyabr kuni soat 6:00 da Eora qishlog'idan chiqib ketish; Templeton chorrahasi yo'nalishi bo'yicha - 2 sentyabr kechgacha; va 4-sentabrga o'tar kechagacha, Damp 1 ga (Templeton o'tish joyidan taxminan 2,5 kilometr janubdagi Eora Creek) qaraydigan joy. Har bir bosqichda 2/14-chi batalyon 2/16-chi batalyonni olib chiqib ketishni namoyish qildi.[342]
Potts ushbu yakuniy topshiriq bilan yaponlarning avansidan toza tanaffus qila oldi, ammo faqat Myolani yo'qotishi bilan - bu relyef yaponlarga juda katta ustunlik berdi va g'arbdagi asl trekdan foydalanib uni chetlab o'tish mumkin edi. Potts Myoladan voz kechdi, etkazib berishni amalga oshirib bo'lmaydigan narsalarni yo'q qildi.[343] Bu avstraliyaliklar uchun muvaffaqiyatli himoya qo'riqchisi sifatida baholandi.[344][37-yozuvlar]
Brigada tepasidagi jang

Allen va Rouell tomonidan stend qo'yish uchun kuchaytirilgan bosim ostida, Potts buni Brigada tepaligidan shimolga qarab Efogi qishlog'i tomon yugurgan Mission Ridge-da amalga oshirishga qaror qildi. Podpolkovnik Jefri Kuper, 2/27-batalyonni boshqargan, 4 sentyabr kuni etakchi kompaniyalar bilan Kagi shahriga etib borgan. Keyin Kuper o'z batalonini Efogining janubida joylashgan joyga jamladi, u erda 6 sentyabr kuni tushdan keyin asosiy kuch pozitsiyasiga qaytarib olinishidan oldin brigadani tekshiruvdan o'tkazishi mumkin edi. 2/27-chi yo'lda oldinga siljish joyini egallab oldi. 2/14-batalyon o'zining orqa tomonida va biroz sharqda edi. Brigadaning shtab-kvartirasi orqadan taxminan 1800 metr (2000 yd) uzoqlikda edi.[38-yozuvlar] 2/16 batalyonining asosiy kuchi brigada shtab-kvartirasi va oldinga batalyonlar o'rtasida bo'lgan, uning D kompaniyasi esa orqa himoya sifatida brigada shtab-kvartirasida joylashgan.[345][346]
Xori avangarddagi 41-polk bilan avans darajasidan norozi bo'lib, uni 5 sentyabrdan 144-polk bilan almashtirdi.[347] Polkovnik Kusonose Masao o'zining ikkinchi va uchinchi batalyonlarini hujumda ishlatgan. 6-sentabrga o'tar kechasi yaponlar o'z pozitsiyalariga o'tishlari bilan avstraliyaliklar Anderson "fonar parad" deb ta'riflagan chiroqlarni kuzatdilar. Ertasi kuni ertalab sakkizta B-26 maruders va to'rtta P-40 samolyotlari eskort, bombardimon va qurolli kuchlar sifatida havo hujumiga chaqirildi. Andersonning ta'kidlashicha, bu ruhiy holatga ko'proq ta'sir qilgan; avstraliyaliklar va yaponlar ijobiy va salbiy, chunki bu qurbonlarga olib keldi.[348][349]
7 sentyabr davomida 3/144-batalyon oldinga qarab ketayotgan avstraliyalik batalyonlarni yapon artilleriyasi va pulemyotlari bilan o'qqa tutib, 2/27-batalyon pozitsiyasiga qarab harakat qildi. 21-brigada faqat brigada boshchiligidagi uchta minomyot uchastkasidan o't o'chirishga qodir edi. Soat 17: 00da brigada urush kundaligi 2/27-batalyonni "minomyotlar, QF qurollari va HMG tomonidan urilgan" deb xabar beradi.[350][351]
Kecha davomida, 2/144-chi batalyon g'arbiy tomonga aniqlanmagan o'rab olingan harakatni amalga oshirdi va brigada shtab-kvartirasi va oldinga batalonlar orasidagi yo'lga qo'shilish uchun tong otguncha tepalikka hujum qildi. Xuddi shu vaqtning o'zida 3/144-batalyon 2/27-batalyonga qarshi kuchli hujum boshladi. Rivojlanayotgan janglarda 2/27 batalyon 2/14 batalyon pozitsiyasiga qaytdi, 2 / 16th va 2/14 batalyonlar janubga qarshi hujumga o'tdilar. Brigadaning shtab-kvartirasi (va 2/16-batalyonning D kompaniyasi) ham shimolga hujum qilib, Yaponiyaning 2/144-batalyonining hujumini muvaffaqiyatsiz tugatishga harakat qildi.[352][353]
Oldindan aloqa uzilishidan oldin darhol Potts brigada guruhining buyrug'ini Karoga topshirdi. Vaziyat yomonlashganda, shtab-kvartirasi guruhi Nauroga yo'l oldi. 2/14-chi va 2/16-chi batalyonlar sharqiy yo'lni kesib o'tdilar va brigadaga qayta qo'shilishdi. Biroq, 2/27-chi batalyon, ularga ergashishga qodir emas edi va uch hafta o'tgach, o'rmondan chiqqunga qadar samarali yo'qolgan deb hisoblanardi. Brigade Xill - Mission Ridjdagi jang yaponlar uchun "ajoyib g'alaba" va avstraliyaliklar uchun "falokat" deb ta'riflangan.[354][346][355]
Ioribayva va Imita Ridj

Missiya Ridjdagi jang tugamaguncha ham, Rovell Pottsni Port Moresbiga chaqirib olish to'g'risida buyruq bergan. 2/14 va 2/16 batalyonlaridan qolganlar 21-brigadaga qo'shilib, Ioribayva tomon janubga chekinishdi va yaponlarning avansini ta'qib qilishdi. Pozitsiyani barqarorlashtirish bo'yicha buyruqlarga ega bo'lgan Porter 10 sentyabr kuni Maroubra Force qo'mondonligini qabul qildi. Bu vaqtga kelib, 2/14-chi va 2/16-chi batalyon kuchini shunchalik kamaytirdiki, ular bir-biridan kuchini birlashtirgan birlashgan kuchga aylandi. Uni 3-batalyon va 2/1-kashshoflar batalyoni, garchi ikkinchisi oldinga siljimagan bo'lsa ham. Vaziyatni yumshatish uchun Eather boshchiligidagi 25-brigada oldinga jo'natilayotgandi. Hujum qilishga tayyorlanayotganda, Eather Maroubra Force qo'mondonligini oldi.[356][357][39-yozuvlar]
Porter kompozitsion batalonni Ioribayva tizmasida trassani bosib, asosiy diapazondan shimoli-g'arbga yo'naltirgan edi. Yo'l trassasi shimoldan Ofi-Krik tomonga tushgan. 3-batalyon yo'lning sharqiy qismida darhol o'ng tomonidagi tizmaga joylashtirilgan. Bu Imita Ridj va trekning boshlig'i oldidagi eng katta to'siq edi. Eter hujum qilishni rejalashtirdi va Portersning yonidan o'zining ikkita batalyoni bilan oldinga o'tib ketdi 2/31 batalyon g'arbiy qanotda va 2/33 batalyon sharqiy qanotda The 2/25-batalyon uning zaxirasi edi. Bu yo'lda Porterning kuchi orqasida joylashdi. 13-14 sentyabrga o'tar kechasi, 25-brigada oldinga o'tishga tayyor bo'lgan Porterning orqa tomonini bivuacked qildi. Eatherning batalyonlari joylashtirilayotganda, yaponlar hujum qilishdi. Ezer zudlik bilan hujumni to'xtatdi va mudofaa pozitsiyasini oldi. Bu uning ilgarilab ketgan batalonlarini ikkala qanotga joylashtirdi va o'zining old qismini sezilarli darajada oshirdi.[358][357]
Brigada tepaligidan Kusonose avstraliyaliklarni 2/144 va 3/144 batalyonlar bilan ta'qib qilishni davom ettirdi. Xori avansni davom ettirish uchun ruxsat olishni kutayotgan asosiy kuchini to'xtatgan edi. Kusonosening dastlabki hujumi 3/144-batalyonning yarmi yo'lning o'qi bo'ylab oldinga siljish bilan amalga oshirildi, 2/144-batalyon esa g'arbiy tomondan yonma-yon hujum qilishi kerak edi. Kusonose avstraliyaliklarning pozitsiyalariga sakkizta quroldan o't qo'yishga muvaffaq bo'ldi. Jang kun bo'yi davom etdi, ammo ikkala hujum ham o'tkazildi. 15 sentyabrda uning zaxirasi, 3/144-batalyonning ikkinchi yarmi, Avstraliya kuchlarining sharqiy qanotlari deb o'ylagan hujumga qarshi hujum uyushtirildi. Maroubra Force-ning kuchaytirilganligini bilmagan holda, bu avstraliyalik 3-batalyon va 2/33-batalyon o'rtasida bo'shliq paydo bo'ldi. O'sha kuni 2/25-chi ikkita va 2/33-batalyonning ikkita kompaniyasining qarshi hujumlari yaponlarni bu joydan siqib chiqara olmadi.[40 ta eslatma][359][357]
16-sentabrdagi janglar avvalgi kundagidek davom etdi, garchi yaponlar 3-batalon va 2/33-batalyon o'rtasida joylashishgan bo'lsa-da,Sankaku Yama (Uchburchak tog '). U erdan ular Eatherning 2/33-batalyon bilan aloqasini buzishdi. O'zining mavqeini zaif deb bilganligi sababli, u Allendan Imita Ridjga qaytish uchun iltimos qildi va ruxsat oldi, Allen boshqa chekinish mumkin emasligini ta'kidladi. Eather ketishni soat 11:00 dan boshladi, Anderson uni "yaxshi uyushgan va tartibli" deb ta'riflaydi.[357][360]
Eather, xususan, muallif Uilyams tomonidan jangdan tezda voz kechgani va g'alaba qozonish uchun Kusonosega ishonib topshirganligi sababli tanqid qilingan. O'z zaxirasini bajarib, Kusonose hali ham Avstraliya himoyasini buzolmadi.[361][357]
Intermediya - Imita tizmasi
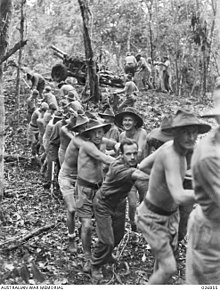
17 sentyabrda Eather Imita Ridjdagi mavqeini mustahkamlay oldi. Ikkinchi / 33-batalyonga har qanday Yaponiyaning oldinga siljishini kechiktirish vazifasi qo'yilgan edi. Aralash natijalar bilan bir qator pistirmalar o'rnatildi.[362] Yo'lning boshiga yaqin bo'lgan Avstraliyaning pozitsiyasi ta'minotdagi qiyinchiliklarni sezilarli darajada hal qildi va tez orada 16-brigadaning kelishi bilan kuch kuchaytirildi.[363] 14-dala polkining ikkita 25 ta pulemyoti nihoyat Maroubra Force-ga artilleriya yordamini taqdim etishi mumkin edi.[364][365]
Yaponlar Brigade Hilldan ilgarilab ketgach, Port Moresbiga qanotli yondashuvlarni ta'minlash uchun patrul xizmati tashkil etildi. Bu ishlatilgan 2/6-mustaqil kompaniya Goldi daryosi bo'ylab Ialibayva tomon Lalokidan patrul qilish va boshqa vazifalar uchun.[366] Jawforce 21-brigadaning sharqiy qanotini qo'riqlash va Naurodan Javarere tomon yo'l olish uchun orqadagi detallardan ko'tarilgan. Honner Force Nauro va Menari o'rtasidagi yapon ta'minot liniyalariga hujum qilish buyrug'i bilan ko'tarilgan. Garchi taxmin qilingan reja ta'minotdagi qiyinchiliklar tufayli barbod bo'lgan bo'lsa-da, u g'arbiy qanotni o'z ta'minotining chegarasida hech qanday muammosiz nazorat qildi. [367][41-yozuvlar]
Ioribayvaga etib borgach, Yaponiyaning etakchi elementlari nishonlana boshladilar - Ioribayva atrofidagi tepaliklarda, yapon askarlari Port-Moresbi va Marjon dengizi tashqarida.[369] Ular Eiterning Imita Ridjdagi mavqeiga erishish uchun kelishilgan harakatlarni amalga oshirmadilar.[362][370]
Ushbu intermediyada Eather yaponiyaliklarni bezovta qilish va ularning ahvoli to'g'risida ma'lumot to'plash uchun Ioribayva tomon patrullik qildi. 27 sentyabrga kelib, u batalyon qo'mondonlariga ertasi kuni "ko'p qirrali" hujum qilish to'g'risida buyruq berdi.[371] Hujum natijasida Ioribayva tashlab ketilganligi va avstraliyaliklar tomonidan otilgan artilleriya samarasiz bo'lganligi aniqlandi. Patrullar zudlik bilan kuzatib borishdi, 2/25 batalyondan biri 30-sentabrga qadar Nauroning ishsizligini aniqladi.[372] Chiqib ketishni buyurgan Ioribayvadagi pozitsiyani oxirgi yapon qo'shinlari 26 sentyabrga o'tar kechasi tark etishdi.[111]
Ikkinchi bosqich - Avstraliyaning qarshi hujumi
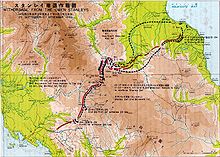
3-batalyon biriktirilgan 25-brigada yaponlarga qarshi yurishni boshladi va 16-brigada Imita tizmasidagi pozitsiyalarni egallashga ergashdi. Allen duch keladigan ta'minotdagi qiyinchiliklarni bilar edi va shunga qarab uning oldinga siljishini boshqarar edi, ammo Blamey va Makartur tomonidan ularni qochib ketayotgan dushman deb bilgan narsalarini ta'qib qilishlari kerak edi. Darhaqiqat, Xori kuchlari toza tanaffus qilishdi va oldindan tayyorlangan to'rtta mudofaa pozitsiyasiga qaytishdi. Bular 2/144-batalyonga asoslangan Stenli otryadining mas'uliyati edi. Dastlabki ikkita pozitsiya Kagidan shimolga ikki yo'lning shimoliy uchlari tomon oldinga siljiydi - asosiy Myola trassasi va Bellami tog'i treki deb ham ataladigan asl yo'l. Uchinchi pozitsiya Templetonning o'tish joyini e'tiborsiz qoldirdi, bu erda ikkita trek birlashdi. To'rtinchi pozitsiya Eora qishlog'ida edi.[373][374]
Eora Krikining ikkinchi jangi - Templetonning kesishishi
10 oktyabrda Myola avstraliyaliklar tomonidan ishg'ol qilindi. 12-oktabrga kelib, 2/33-chi batalyon Templetonning Myola trassasida va Bellamy tog'idagi 2/25-chi batalon tomon o'tishdi. 16-brigada Menariga Myolada mavqeini egallashga intilib, brigada Templeton o'tish joyidan o'tayotganda avangardni olishga intildi.[375][376]
Aloqa qilish uchun avstraliyalik avans

Myola trassasida Stenli otryadi asosiy kuchini yo'l bo'ylab ancha chuqurlikda va yaxshi rivojlangan pozitsiyalarda joylashtirdi. 2/33-batalyonning oldinga qo'riqchisi 10-oktabr kuni eng engil ushlab turilgan pozitsiyaga murojaat qildi. Lavozimlar bir qator frontal va yonboshdagi harakatlarga qarshilik ko'rsatdi. 14-oktabrgacha 3-batalyon g'arbiy qanot atrofida harakatlanib, 15-oktabrdagi hujumda 2/33-chi batalyon bilan muvofiqlashtirildi. Biroq, hujum yaponlarning allaqachon orqaga chekinganligini aniqladi.[377][378]
Bellamy tog'ida 2/25-chi batalyon 13 oktyabrda oz sonli yapon kuchlari bilan uchrashdi va 15 oktyabr kuni yaponlarning pozitsiyalari haqida aniq xabar bergandan so'ng, ertasi kuni Templeton's Crossing-da patrul qildi.[379] Keyinchalik bu ikkita kelishuv Templetonning Ikkinchi jangining - Eora Creekning ochilish bosqichi sifatida aniqlandi.[380]
Templetonning o'tish joyi
25-brigadaning batalyonlari (orqada 2/31 bataliondan kamroq) 16-oktabr kuni Templeton chorrahasida temir yo'lning shimoliy qo'shilish joyiga etib bordi. 3-batalyon oldinga siljish bilan Yaponiyaning pozitsiyasi tushdan keyin aniqlandi. U Eora Krikidan sharqqa va o'tish joyidan 450 metr (500 yd) shimolga ko'tarilgan baland yo'lda yurgan. Stenli otryadi asosiy tog 'tizmasidan soyga qarab yugurayotgan ikkita parallel shpalni egallab olgan edi. Endi 3-batalyonga qo'mondonlik qilayotgan Kemeron ertaga hujum qilish uchun kuchini jamladi. 17 va 18 oktyabr kunlari hujumlar Yaponiya sharqiy qanotidagi balandlikdan 3-batalyon va 2/25-batalyonning A va D kompaniyalari tomonidan boshqarilgan, ammo hal qiluvchi natijaga erisha olmagan.[381][382]
19 oktyabr kuni ertalab 2/2-batalyon podpolkovnik Sedrik Edgar 3-batalyonga yordam berish uchun oldinga intildi, 16-brigadaning qolgan ikkita batalyoni esa brigadir Jon Lloyd boshchiligida 2/25-chi va 2/33-chi batalyonlarni bo'shatdi. 20-oktabr kuni 2/2-batalyon balandlikdan sharqqa to'rtta kompaniyani ishg'ol qildi. Ushbu hujum ertasi kuni, 21-oktabrda yangilanishi kerak edi, ammo Stenli otryadi tunda orqaga qaytdi. Xori asosiy kuchi Kokoda-Oiviga olib ketilgan edi. Stenli otryadi Templeton kesishmasidan chiqib ketishga majbur bo'lganida, u Eora qishlog'idagi so'nggi mavqega ega bo'lgan odamga mavjud bo'lgan barcha kuchlarni yubordi.[383][384]
Eora qishlog'i

Keyin avstraliyaliklar Eora qishlog'iga qarab harakatlana boshlashdi. Patrul Eora qishlog'iga soat 10:30 atrofida kirib kelganida, u o'qqa tutilgan.[385] From the village, the track crossed log bridges over Eora Creek and a tributary before following along the western side of Eora Creek as it headed northward. Overlooking the village from the north was a spur-line rising to the west. It was here that the Japanese had prepared two defensive positions – one on the lower slopes of the spur and another much higher up. Anderson reports that the Japanese had spent nearly two months in fortifying the position. From these, they could bring fire from medium machine guns and five artillery pieces.[386][notes 42]
On the afternoon of 22 October, against representations from his battalion commanders,[notes 43] Lloyd ordered a frontal attack on the Japanese [lower] position. This commenced shortly after. Anderson describes what followed as being highly confused but, dawn of 24 October found the attacking force of battalion strength largely pinned down in front of the Japanese position, having suffered 34 killed and many more injured, with no prospect of success. Lloyd then ordered the 2/3-batalyon podpolkovnik boshchiligida Jon Stivenson to attack down on the Japanese positions from the top of Eora Ridge (to the west) but this took two days to deploy to the forming-up point.[388][389]
The attack of the 2/3rd Battalion commenced in the morning of 27 October. Horii had ordered a withdrawal from the position on the night of 28 October. The 2/3rd Battalion resumed its attack on 28 October, co-ordinated with the remainder of the brigade. The position was now only lightly held by the 3rd/144th about to withdraw, and the situation turned into a rout.[390][391]
Kokodaning ishg'oli

On 28 October, Vasey arrived at Myola to relieve Allen.[392] The Australian advance recommenced on 29 October. With a loss of positions that commanded the Gap and the approach to Port Moresby, Horii turned his attention to defending the beachheads at Buna–Gona. He concentrated his force around Oivi and Gorari. While a rearguard force screened his preparations, this was successively withdrawn without contact being made.[393][394]
Aola was entered on 30 October and airdrops the following day alleviated supply problems as the Australian line-of-communication extended from Myola. On 2 November, a patrol of the 2/31st Battalion entered Kokoda and found that it had been abandoned.[44-yozuvlar] At 3:30 pm the following day, Vasey led a flag-raising ceremony with hundreds present. The 7th Division could now land supplies at Kokoda. On 6 November, Vasey held a further ceremony in which he awarded medals and made gifts of trade-goods to the Papuans that had supported the Australians.[396]
Oivi-Gorari jangi
From Kokoda, the route to Wairopi, and then, to Buna–Gona, was mainly easterly, whereas the advance from Eora Village was mainly to the north. On the main track from Kokoda to Waropi (at the crossing of the Kumusi River) Horii had constructed strong defensive positions, prepared several weeks before. These were centred on the heights overlooking Oivi, with a position in depth at Gorari, which also covered an approach from the southern parallel track. The 41st Regiment, with a battalion of the 144th Regiment and seven artillery pieces faced an advance from the west. Two battalions of the 144th Regiment held the position at Gorari and a track approaching from the south. The force headquarters was to the immediate rear.[394]

The 16th Brigade (including the 3rd Battalion) patrolled toward Oivi, making contact on 4 November. In fighting that continued until 6 November, it tried unsuccessfully to break the position. Vasey then committed the 25th Brigade, with the 2/1-batalyon attached, to an attack from the south toward Gorari. The brigade was to advance along the southern parallel track as far as Waju. The 2/1st Battalion leading, initially overshot this and had to retrace its steps but was ready to advance north on 7 November. Horii had become aware of the Australian movement and dispatched his two battalions at Gorari south along the connecting track. They established an all-round defence on a position near Baribe, about halfway between the two parallel tracks. Horii also called the 1st/144th back from Oivi to occupy the position left vacant at Goari.[394]
On 8 November, Eather contacted the position at Baribe, enveloping it with the 2/25th and 2/31st Battalions. On 9 November, the 2/33rd and 2/1st Battalions pushed around the Japanese position on the connecting track and advanced on Gorari, where they attacked the 1/144th Battalion and Horii's headquarters. Bombing and strafing attacks were also conducted against the Japanese positions near Oivi. By 10 November, Horii ordered a withdrawal but the situation for the Japanese had degenerated into a rout. Fighting had largely ceased by midday 11 November. The Japanese lost around 430 killed, around 400 wounded and abandoned fifteen artillery pieces among other material.[394][397]
Buna-Gona bo'yicha avans

Most of the Japanese force withdrew to the Kumusi River and 1,200 are estimated to have made the crossing of the flooded river.[398] Horii was swept downstream and later drowned. Others followed the river downstream to the coast. Milner reports the strength gathered there as 900, under command of Colonel Yazawa.[8] The 25th Brigade contacted the Japanese rearguard near Wairopi on 12 November but these withdrew in the night. While most of Vasey's force was rested, patrols continued to search out Japanese survivors and engineers were dealing with the problem of establishing a bridgehead. The crossing of the two brigades was completed on the morning of 16 November and they began their advance on the Japanese beachheads. The 25th Brigade took the track toward Gona while the 16th Brigade advanced along the track toward Sanananda. Elements of the US 32nd Division were advancing on Buna by a coastal route from the southeast.[399][400]
AQSh 32-diviziyasining yonma-yon harakatlari
AQSh 32-divizion had arrived in Australia in May.[401] With few US forces to choose from, General Douglas MacArthur ordered the divisional headquarters and two regimental combat teams from the 126th and 128th infantry regiments to deploy to Port Moresby. They arrived between 15 and 28 September 1942. On 11 September, MacArthur added a plan for the 126th Infantry Regiment to conduct a wide flanking move to the east with the goal to engage the Japanese rear near Wairopi. The 2nd Battalion 126th Regiment, with supporting elements attached, was tasked with traversing the track from Kapa Kapa to Jaure. From Jaure, at the headwaters of the Kumusi River, the force was to advance toward Wairopi. The little-used track from Kapa Kapa to Jaure was 137 kilometres (85 mi) long.[402]

The 32nd established a position at Kalikodobu, nicknamed "Kalamazoo" by the GI, a short distance along the track. From here, the main body of the 2nd Battalion departed on 14 October 1942. The battalion had assembled at Jaure by 28 October. The Americans were utterly unprepared for the extremely harsh conditions they faced which significantly delayed their advance.[403]
The planned envelopment of the Japanese forces never took place due to both the slow rate of the American advance and the unexpected, rapid withdrawal of the Japanese forces. While the 2/126th crawled over the Kapa Kapa Track, the balance of the 32nd Division was flown to newly developed advance airfields on the north side of the island. The 128th Regiment was flown to the most forward of these, located at Wanigella. From there, troops moved overland toward Buna or were ferried part of the way in coastal vessels, to meetup with Australian forces advancing on the Japanese beachheads.[404] The first units of the 2/126th arrived in Soputa on 20 November 1942.[405]
A similar proposal for attacking the Japanese rear near Wairopi was made by Brigadier Potts, following withdrawal of the 21st Brigade after Ioribaiwa. Chaforce, raised from battalions of the 21st Brigade (each contributing a company) was to be assigned the task of penetrating from Myola into the Kumusi River valley. With initial approval to advance to Myola, the operation was subsequently cancelled sometime shortly after 18 October 1942.[406]
Natijada
Keyingi voqealar
The Japanese at Buna–Gona were reinforced by fresh units from Rabaul. The joint Australian–Amerika Qo'shma Shtatlari armiyasi operation faced a formidable defence that had been prepared well in advance of their arrival and the battle lasted until 22 January 1943. The 39th Battalion participated in the fighting at the beachheads and, following its withdrawal, was only able to parade about 30 members – its ranks having been greatly depleted by injury and illness. In March 1943 it was withdrawn back to Australia where it was disbanded in July 1943.[407]
While this campaign, Milne Bay and the sea battles of Coral Sea and Midway ended the threat to Australia, the Australian government continued to warn the citizenry until mid-1943, that an invasion was possible.[14] Allied operations against Japanese forces in New Guinea, including Cartwheel operatsiyasi va Salamaua-La kampaniyasi, continued into 1945.[408]
Kuchlar va qurbonlar
A total of 13,500 Japanese were ultimately landed in Papua for the fighting during the campaign.[2] Of these, about 6,000 or two regiments, were directly involved in the "forward areas" along the Track.[409][410] Against this, the Allies assembled approximately 30,000 troops in New Guinea,[45-yozuvlar] although at any one time no more than one infantry brigade, or approximately 3,500 troops, were involved in the fighting for most of the campaign.[61] In terms of total troops committed over the course of the campaign, author Peter Williams estimates that "more than twice as many Australians than Japanese fought on the Kokoda Track".[411]

Casualties amongst the Australians between 22 July and 16 November 1942 were 39 officers and 586 men killed and a further 64 officers and 991 men wounded, for a total of 625 killed and 1,055 wounded. Notably, three battalion commanders were killed or captured in the first month of fighting.[47-yozuvlar] Non-battle, or sickness, casualties are not accurately recorded but are stated to have been about two to three times the battle casualty figure.[412][5] The exact number of Japanese casualties is not known, although Williams estimates battle casualties at 2,050 between the initial fighting around Awala and the final battle at Oivi–Gorari.[4] Non-battle casualties, however, increase this figure and it is estimated that of the 6,000 troops, or five infantry battalions, that were committed to the fighting, up to 75% became casualties, being either killed, wounded or becoming ill.[5]
Harbiy jinoyatlar
Davomida Tokyo War Crimes trial after the war, there was not enough evidence to bring formal charges with regard to the claims of cannibalism by Japanese soldiers. Some Japanese soldiers were tried and convicted in Australian-run military courts held in New Guinea.[413][414] The Japanese were also responsible for the torture and execution of both combatant and non-combatant personnel including two female missionaries, May Hayman and Mavis Parkinson, during the campaign. Though not limited to the early stages of the campaign, McCarthy recounts events in the initial phase of the Kokoda campaign. All of the Australian servicemen captured during the course of the campaign were executed.[415]
Australian soldiers also treated their opponents harshly. Most took a "chorak yo'q " attitude, and killed Japanese personnel rather than attempt to take them prisoner in the infrequent occasions where Japanese troops attempted to surrender. Despite official instructions against doing so, Australian soldiers often took the personal possessions of dead Japanese and there were several instances where gold teeth were taken from corpses. These attitudes were influenced by a view that the Japanese were deceitful, a desire to exact revenge for atrocities committed against Allied personnel (including the killing of prisoners of war) and latent racism.[416]
Nomenklatura
There is some debate as to whether the correct name for the route over the range is the "Kokoda Track" or "Kokoda Trail". The battle honour awarded for the campaign, as determined by the Battlefields Nomenclature Committee, is "Kokoda Trail". The Avstraliya urush yodgorligi has adopted "Trail", largely for this reason.[36]
Despite the historical use of "Trail", "Track" gained dominance in the 1990s, with the Australian Macquarie lug'ati stating that while both versions were in use, Kokoda Track "appears to be the more popular of the two".[417][48-yozuvlar]
Jang sharaflari
For eligible Australian units, the jang sharafi "Kokoda Trail" was bestowed. Seven subsidiary honours were also bestowed. The honour, "Kokoda–Deniki" was awarded to the 39th Battalion and the Tinch okean orollari polki, which succeeded the PIB. The honour, "Efogi–Menari" was awarded for engagements between 6–9 September and included the battle at Brigade Hill–Mission Ridge. Other honours were: "Isurava", "Eora Creek–Templeton's Crossing I", "Ioribaiwa", "Eora Creek–Templeton's Crossing II" and "Oivi–Gorari". The 53rd Battalion did not receive any battle honour for the fighting during the Kokoda Track campaign.[380][419]
Aksiyaning ahamiyati

Da Gelibolu kampaniyasi ning Birinchi jahon urushi was Australia's first military test as a new nation, the fighting during the Kokoda campaign represents the first time in the nation's history that its security was directly threatened. 1942 yil kinoxronika hujjatli, Kokoda Front Line! documented the Australian fighting during the campaign and brought the war home for many Australians. Tomonidan suratga olingan Damin Parer, u g'olib chiqdi Oskar for the documentary category – the first time an Australian film/documentary was awarded an Oscar.[notes 49] Curator, Poppy De Souza, observes: "This iconic newsreel contains some of the most recognised images of Australian troops in the Second World War, images that have contributed to the collective visual memory of the events at Kokoda. ...[quoting Parer] a war that seemed until this point 'a million miles away’".[420][421] Although it has since become accepted that an invasion of Australia was not possible, or even planned by the Japanese, at the time there was a very real belief within Australia that this was possible and as such the Kokoda campaign has come to be viewed by some as the battle that "saved Australia".[422] As a result, within the collective Australian psyche, the campaign and particularly the role of the 39th Battalion has become a key part of modern notions of the Anzac legend.[423] Indeed, the Battle of Isurava has been described as "Australia's Thermopylae",[424] although the key premise of this comparison—the idea that the Australians were outnumbered—has since been shown to be inaccurate.[425]
Nevertheless, the Allied campaign was hampered by the poor intelligence available, which included antiquated maps, unfamiliarity with the terrain, and limited aerial photography. Senior military commanders including MacArthur and Blamey were unaware of the extraordinarily difficult terrain and the extreme conditions in which the battles would be fought, and orders given to the commanders were sometimes unrealistic given the conditions on the ground.[426] In the end though, the strategy used against the Japanese in Papua—widely criticised at the time—led to an eventual, though costly, victory.[412] The American official historian Samuel Milner judged that "the only result, strategically speaking" of the Kokoda track campaign and subsequent fighting in Papua "was that after six months of bitter fighting and some 8,500 casualties, including 3,000 dead, the South West Pacific Area was exactly where it would have been the previous July had it been able to secure the beachhead before the Japanese got there".[427] More recently, Australian historian Nicholas Anderson has concluded that while the Kokoda Track was a significant Allied victory, it was less important to the outcome of the Pacific War than the defeat of the main Japanese effort at this time during the Guadalcanal Campaign.[428]
The campaign also served to highlight the strengths and weaknesses of the individual soldiers and the lower level commanders.[412] Following this and the fighting that followed at Buna–Gona, the American and Australian armies would take steps to improve individual and unit training and medical and logistic infrastructure would also be greatly improved, with an increased focus upon air transport to solve the supply problem.[412][429] Within the Australian Army, there was a major restructure with the formation of Jungle divisions which addressed manpower issues and were more suited to operations in jungle environments. There was a significant reduction in the scale of motor transport, and Jeeps, with greater cross-country mobility, were employed rather than trucks. At battalion level, changes included increasing the number of mortars to eight, the addition of a machine gun platoon with four Vickers guns to enhance organic fire support, and a removal of the tashuvchi vzvod.[430] The Quruq urush markazi, as it is now known, was established at Kanungra, Kvinslend, with an emphasis on training for jungle warfare.[428] Adrian Threlfall, in his thesis and subsequent book explores the challenges faced and how these shaped the Australian Army as a jungle warfare force.[431][432]
Shuningdek qarang
Adabiyotlar
- Izohlar
- ^ Between the initial fighting around Awala and the final battle at Oivi–Gorari.
- ^ The figure is based on an estimated strength of 6,000 and a 75% rate. There is some difficulty in disentangling and distinguishing between the fighting that occurred "along the track" and the force that garrisoned Buna–Gona and was engaged in the battle that followed from 16 November 1942 to 22 January 1943.[6] The effective strength at Buna–Gona at the conclusion of the Kokoda Track campaign is generally quoted at about 5,500[7][8] but an estimate of 9,000 represents the total strength, including labour units, non-combat forces, sick and injured. This is based on the interrogation of Lieutenant General Xatazō Adachi urush oxirida. Adachi commanded the 18th Army, of which the Buna–Gona garrison was part.[8]
- ^ Milner refers to the strip at Buna as being "small and neglected".[31]
- ^ After the initial landing, it was quickly made trafficable for 60 kilometres (35 mi) from the coast to Sonbo.[35]
- ^ The Kokoda Track Commemorative web site[43] and James[44] give a cross-section of the track.
- ^ The 53rd Battalion received a significantly smaller proportion of these.
- ^ The strength here is from McCarthy.[76] The operational instruction gives a strength of 20 "white officers" and 280 "native" other ranks.
- ^ Some authors have stated that the order was to deploy "white troops" and indeed, this is what is recorded in the NGF War Diary,[78] ammo; the signal from LHQ required the deployment of "Australian infantry".
- ^ Anderson 2014 yil uses "Maroubra Force" throughout for the forces fighting along the track. Situation reports issued by NGF Headquarters continued to identify the 7th Division as "Maroubra" until 17 November, effectively, the end of the Kokoda campaign and commencement of operations for the advance toward the beachheads at Buna and Gona.[83] For further details, see main article – Maroubra Force.
- ^ Haruki Yoshida 2017, p. 209 identifies Mawai as near Nauro.
- ^ Bullard reports that radio communication with Rabaul was based at Kokoda and that there was a lag in the order of three days each way in communications between the 17th Army headquarters and Horii's forward headquarters.[108] Bullard cites the message of 19 September but does not quote the contents. He does quote the subsequent order of 23 September.[107]
- ^ The vessel having arrived on 19 July.[117]
- ^ Anderson 2014 yil, p. 31 reports that the reinforcement was made by a single plane in two flights; ammo, Kelly 2003 yil, p. 354 identifies it was flown by two different planes of different types and is able to identify them by type. Moremon 2000, pp. 130–131 reports that there were only two transports at Port Moresby at the time, having just arrived from Australia, and one of these was declared unserviceable on arrival with engine problems. Anderson reports the flight time to Kododa as 20 minutes with there being 90 minutes between each fight landing at Kokoda.
- ^ A requisition to the US was made on 21 July for 5,000 parachutes and containers. An initial delivery of 1,000 parachutes (less containers) was sent by plane on 22 September, with the remainder, sent by ship.
- ^ Moremon 2000, pp. 180–181 reports that this was not initially adopted (until perhaps the latter part of August) and, had it been, it would have saved a great deal of manpower, with many thousands of blankets having been carried overland.
- ^ McCarthy gives an account of the progress that had been made and the methods employed as the Australians advanced in early to mid–October.[128]
- ^ The war diary of the 21st Brigade reports that on 4 September, one killed and two injured by an airdrop.[132]
- ^ Gillison appears to refer to the transports generically as "Dakotas". It is apparent from the other sources that the transport planes involved were a mix of civilian and military types rather than the Duglas C-47 Skytrain, to which this designation specifically applies.
- ^ Myola 2 was used as the main drop zone during the Australian advance. There are no reports identified, of finding remnants of such a large quantity of rations.
- ^ See caption for AWM photograph "P02424.085". tafsilotlar uchun. "150934". identifies the plane in that photograph as an Aeronca L-3 but the distinctive difference in the engine cowling identifies this as an L–1.
- ^ Pilger 1993, p. 60 is quite specific as to the evacuation being forward to Kokoda for cases that had to be carried even though Makkarti 1959 yil, p. 317 and Walker 1956 yil, pp. 76–77 are somewhat ambiguous in respect to what actually occurred. Moremon 2000, pp. 328–329 supports Pilger in this matter.
- ^ It fired the 7.7×58mm Arisaka round which was "heavier" than the 6,5 × 50 mm SS Arisaka dan otilgan Type 38 Arisaka rifle. Though designated as a heavy machine gun at the time, it fired a rifle sized cartridge and is thereby generally considered to be a medium machine gun.
- ^ Sometimes referred to as a "quick fire" gun because of its rapid rate of fire. This should not be confused with the British nomenclature, where "quick fire" (abbreviated "QF" - as in, the Ordnance QF 25 asoschisi ) referred to artillery that fire cartridges as opposed to a shell and separate charge bags.
- ^ Earlier sources refer to the Japanese using [medium] mortars and heavy mortars and it would appear that this gun has been identified as such.
- ^ At about this time, improvements increased the range to about 2,500 metres (2,700 yd).
- ^ The establishment of Vickers within battalions at the time is unclear and likely varied between Militia and AIF units. War diary entries for the 39th Battalion refer to its machine gun company at Deniki, while other sources refer to this as E Company. Hocking explains that following a reorganisation of the 6-divizion 's infantry battalions in late 1939, the machine gun platoons that had previously existed within each battalion were removed and centralised in a single unit at divisional level.[178]
- ^ Moremon 2000, p. 179 reports a message from NGF to Potts of 24 August that it intended to drop five 3–in mortars and 300 bombs each at Myola as soon as the ration situation permitted.
- ^ New Guinea Force Operation Instruction No. 24 of 18 August 1942.[205]
- ^ New Guinea Force Operation Instruction No. 26 of 9 September 1942.[230]
- ^ Lieutenant Colonel Minogue, a liaison officer from HQ NGF was forward with Allen, attending a conference at Myola on 23 October, but Blamey acted to relieve Allen before his report was received
- ^ This dressing-down indicates the intent of Blamey's subsequent address that day to the soldiers of the 21st Brigade.
- ^ Churchill wished to divert at least part of the force to Burma.
- ^ The second flight, was nearing Oivi at 5:30 pm. Misinformed that Oivi was lost it returned to Kokoda.[269]
- ^ McCarthy reports the force at Kokoda as 80, inclusive of the PIB, and notes two sections (nominally 20) left at Deniki under command of Lieutenant McClean. Williams gives a detailed tally of the force available to Owen, totalling 148, however; it is unclear whether this inclusive of McClean's detachment.[274][275]
- ^ There is a discrepancy among the sources about the reasons behind why the American pilots did not land. Keogh states that they were ordered to return to base by Morris, who was unable to determine whether the Australians still held Kokoda.[276] Brune, however, states that the pilots were not ordered to return to Port Moresby, but in fact refused to land due to fears that the Japanese would attack before they could take off again. According to eyewitnesses on one of the planes, the pilot repeatedly refused Lieutenant Lovell's demand that they land and that they could clearly see Australians clearing barricades from the airfield, indicating that the 39th Battalion still held the airfield.[277] There is also some confusion as to who was on the aircraft and when this occurred. McCarthy and McAulay also recount that the event occurred on 28 July.[278][279] However, the NGF war diary reports the incident as being on 27 July. It refers to the pilot observing "our troops and natives" removing barriers and a radio signal recalling the plane. The preceding entry in the diary was at 4:00 pm the previous day from Maroubra, advising that Kokoda "could not now be held" as the position at Oivi had been "surrounded and abandoned". The entry of 27 July records that the two planes had been sent before the message from Maroubra had been received.[280] The war diary of the 39th Battalion is consistent with that of NGF, in stating that two planes containing troops of the 39th Battalion arrived over Kokoda on 27 July and returned without landing. It reports that these troops were from D Company and that Lieutenant Lovell, the battalion's adjutant, was also on board.[281] Milner reports the flight of planes on 27 July, but none subsequently during the first battle.[282] Williams goes further, saying that the planes of 28 July contained reinforcements from D Company of the 49th Battalion. When Owen reoccupied Kokoda he requested reinforcements and Morris issued orders for a company of the 49th Battalion and 3 Platoon (mortars) of the 39th Battalion to be air lifted to Kokoda early on 29 July.[283] The succeeding entries in the diary record the loss of Kokoda in the early morning of 29 July and that arrangements for air transport of reinforcements to Maroubra were "again suspended".[280] Orders that the reinforcement planned for 29 July was to be drawn from 49th Battalion are confirmed by the battalion's war diary, with flights due for departure at 6:00 am on 29 July.[284]
- ^ It is also referred to in some sources as E Company.[300][299] Shuningdek qarang McAulay 1992a, p. 58
- ^ Moremon 2000, pp. 191–192 observes that the withdrawal was constrained by the rate at which casualties could be evacuated, particularly given that the Japanese were known to kill any that might fall into their hands. This dictated that the withdrawal was fought by relatively short bounds where longer bounds might otherwise have been preferable and allowed for a clean break to have been made earlier.
- ^ Determined from map (Anderson 2014 yil, p. 90).
- ^ Uilyams 2012 yil, p. 143, clarifies Eather's status as commander of Maroubra force: "Although Eather was not officially placed in command of Maroubra Force until 17 September, he exercised command at Ioribaiwa under the instructions of his divisional commander, Major General Arthur Allen, and with the compliance of Porter. Having consulted Porter, already on the ridge, Eather decided to leave Porter blocking the track while using his own brigade to swing around both flanks..."
- ^ A Company of the 2/33rd Battalion was initially tasked to attack but found the terrain too difficult. D Company was then committed.
- ^ Part of this responsibility fell to the 6th Division which, at about this time consisted of the 21st and 30th Brigades, the 2/6th Independent Company and the newly arrived US 128th Regiment.[368]
- ^ Of note, battle maps provided by McCarthy indicate heavy mortars and a mountain gun.[387]
- ^ They favoured an attack from the west, down onto the position, as had been used to break the position at Templeton's Crossing.
- ^ On 25 October, a patrol of the 2/6th Independent Company under Lieutenant Frederick Winkle entered Kokoda and withdrew when eventually fired upon.[395]
- ^ A figure quoted by Blamey to the Australian Advisory War Council on 17 September 1942 and cited by Makkarti 1959 yil, p. 234. This figure was for the defence of the Australian territories and not just concentrated to defend against the advance from Kokoda.
- ^ Private Vasil (Basil) Albert 'Babe' Lucas enlisted on 20 June 1940, aged 15, with the service number NX33033. Pte Lucas had put his age up to enlist. He was discharged on 17 November 1940 and re-enlisted on 4 April 1941in 2/3 Battalion. He served in Syria, Bardia and Tobruk and later in New Guinea on the Kokoda Track. He was killed in action on 25 November 1942 after an advanced dressing station to which he had been admitted with scrub typhus was strafed by Japanese aircraft. He was one of nine brothers from the Lucas family who enlisted from the Bega district. Many of the brothers had multiple enlistments and some enlisted together and served together for periods of time.
- ^ These were: Owen, of the 39th Battalion; Ward, of the 53rd Battalion; and, Key, of the 2/14th Battalion who was captured and subsequently executed.
- ^ In his 2009 study, James reviews the issue in detail and concludes no definitive historical basis for preferring one over the other.[418]
- ^ It was shared with three other winners.
- Iqtiboslar
- ^ Makkarti 1959 yil, p. 234.
- ^ a b Makkarti 1959 yil, p. 146.
- ^ Makkarti 1959 yil, 334-335 betlar.
- ^ a b Uilyams 2012 yil, p. 235.
- ^ a b v Kultard-Klark 1998 yil, p. 223.
- ^ James 2009, p. 72.
- ^ McAulay 1992b, p. 12.
- ^ a b v Milner 1957 yil, p. 144 and note 48.
- ^ Wigmore 1957 yil, p. 490.
- ^ Dennis va boshq. 2008 yil, pp. 458, 468.
- ^ Grey 1999, p. 171.
- ^ Day 1999, pp. 452–457.
- ^ Stenli 2008 yil, p. 156.
- ^ a b Stenli 2007 yil, p. 29.
- ^ Uilyams 2012 yil, p. 10.
- ^ Horner 1993, 4-5 bet.
- ^ Jeyms 2013 yil, p. 200.
- ^ a b Bullard 2007, 96-99-betlar.
- ^ Jeyms 2013 yil, p. 202.
- ^ Milner 1957 yil, 40-42 betlar.
- ^ a b Keogh 1965 yil, p. 166.
- ^ Milner 1957 yil, 43-44-betlar.
- ^ Milner 1957 yil, 51-55 betlar.
- ^ War Diary: New Guinea Force Headquarters and General (Air). "AWM52 1/5/51/15: July 1942, part 2, appendices" (PDF). Avstraliya urush yodgorligi. pp. 5–6 (of pdf). Olingan 13 may 2017.
- ^ a b War Diary: New Guinea Force Headquarters and General (Air). "AWM52 1/5/51/14: July 1942, part 1" (PDF). Avstraliya urush yodgorligi. pp. 34–36 (of pdf). Olingan 13 may 2017.
- ^ War Diary: AWM52 1/1/1 – General Staff (Operations) General Staff (Staff Duties) Land Headquarters (LHQ G(Ops) and (SD)). "AWM52 1/1/1/11: July – August 1942" (PDF). Avstraliya urush yodgorligi. pp. 23–26 & 36 (of pdf). Olingan 13 may 2017.
- ^ a b Keogh 1965 yil, p. 155.
- ^ McAulay 1992a, p. 16.
- ^ Brune 2003, 84-85-betlar.
- ^ Ham 2004, pp. xvi–xvii & 47.
- ^ Milner 1957 yil, p. 50.
- ^ Bullard 2007, p. 98.
- ^ Makkarti 1959 yil, p. 110.
- ^ Milner 1957 yil, p. 61.
- ^ a b v Bullard 2007, p. 107.
- ^ a b James 2009, p. 60.
- ^ a b Kienzle 2011, p. 123.
- ^ Keogh 1965 yil, p. 171.
- ^ Kolli va Marutani 2009 yil, p. 55.
- ^ Keogh 1965 yil, p. 17.
- ^ Kienzle 2011, p. 110.
- ^ Pérusse 1993, p. 98.
- ^ a b "Topography of Kokoda". The Kokoda Track. Avstraliya hukumatining faxriylar ishlari departamenti. Arxivlandi asl nusxasidan 2015 yil 14 martda. Olingan 29 noyabr 2014.
- ^ James 2009, trek xaritasi.
- ^ a b James 2009, p. 32.
- ^ Makkarti 1959 yil, 109-110 betlar.
- ^ Walker 1956 yil, pp. 12, 70–71 & 108–124.
- ^ Anderson 2014 yil, 125-126-betlar.
- ^ James 2009, p. 20.
- ^ Walker 1956 yil, p. 72.
- ^ Smit 2000 yil, p. 25.
- ^ Bullard 2007, 99-100 betlar.
- ^ a b Bullard 2007, p. 106.
- ^ Bullard 2007, pp. 101–105.
- ^ Bullard 2007, 109-13 betlar.
- ^ Bullard 2007, p. 131.
- ^ a b Bullard 2007, p. 142.
- ^ Bullard 2007, 134-136-betlar.
- ^ Bullard 2007, p. 132.
- ^ a b v Bullard 2007, p. 134.
- ^ a b Makkarti 1959 yil, p. 334.
- ^ a b Bullard 2007, p. 135.
- ^ Anderson 2014 yil, p. 26.
- ^ a b Bullard 2007, p. 140.
- ^ a b Anderson 2014 yil, p. 22.
- ^ Makkarti 1959 yil, p. 44.
- ^ Brune 2003, p. 561.
- ^ Anderson 2014 yil, p. 23.
- ^ Makkarti 1959 yil, p. 44-45.
- ^ Bullard 2007, p. 40.
- ^ Milner 1957 yil, 39-42 betlar.
- ^ Anderson 2014 yil, p. 47.
- ^ Milner 1957 yil, pp. 74 & 76.
- ^ Anderson 2014 yil, p. 22; Makkarti 1959 yil, pp. 45 & 114.
- ^ War Diary: New Guinea Force Headquarters and General (Air). "AWM52 1/5/51/13: 1942 yil iyun" (PDF). Avstraliya urush yodgorligi. pp. 49–50 (of pdf). Arxivlandi (PDF) asl nusxasidan 2016 yil 4-noyabrda. Olingan 3 may 2017.
- ^ Makkarti 1959 yil, p. 114.
- ^ War Diary: AWM52 1/1/1 – General Staff (Operations) General Staff (Staff Duties) Land Headquarters (LHQ G(Ops) and (SD)). "AWM52 1/1/1/10: June 1942, part 2, appendices" (PDF). Avstraliya urush yodgorligi. p. 84 (of pdf). Olingan 3 may 2017.
- ^ War Diary: New Guinea Force Headquarters and General (Air). "AWM52 1/5/51/13: June 1942: New Guinea Force Headquarters" (PDF). Avstraliya urush yodgorligi. p. 8 (of pdf). Arxivlandi (PDF) asl nusxasidan 2016 yil 4-noyabrda. Olingan 3 may 2017.
- ^ Milner 1957 yil, 50-52 betlar.
- ^ War Diary: New Guinea Force Headquarters and General (Air). "AWM52 1/5/51/13: June 1942: New Guinea Force Headquarters" (PDF). Avstraliya urush yodgorligi. pp. 8–9 (of pdf). Arxivlandi (PDF) asl nusxasidan 2016 yil 4-noyabrda. Olingan 3 may 2017.
- ^ War Diary: New Guinea Force Headquarters and General (Air). "AWM52 1/5/51/13: June 1942: New Guinea Force Headquarters" (PDF). Avstraliya urush yodgorligi. pp. 53–54 (of pdf). Arxivlandi (PDF) asl nusxasidan 2016 yil 4-noyabrda. Olingan 3 may 2017.
- ^ a b Makkarti 1959 yil, p. 117.
- ^ "AWM52 1/5/51/20: November 1942" (PDF). War Diary – New Guinea Force Headquarters and General (Air). Avstraliya urush yodgorligi. pp. 76–77(of pdf). Arxivlandi (PDF) asl nusxasidan 2016 yil 29 oktyabrda. Olingan 29 oktyabr 2016.
- ^ Makkarti 1959 yil, p. 126.
- ^ a b Anderson 2014 yil, p. 40.
- ^ Milner 1957 yil, 62-63 betlar.
- ^ Anderson 2014 yil, 27-39 betlar.
- ^ Anderson 2014 yil, 46-50 betlar.
- ^ Anderson 2014 yil, pp. 51–87.
- ^ Anderson 2014 yil, 88-100 betlar.
- ^ Anderson 2014 yil, pp. 101–131.
- ^ Anderson 2014 yil, pp. 132–193.
- ^ Makkarti 1959 yil, pp. 311–335.
- ^ Milner 1957 yil, pp. 81, 87.
- ^ Coates 2006, p. 232.
- ^ Hough 1958, p. 252.
- ^ Dod 1966 yil, p. 172; Hough 1958, p. 254.
- ^ Dod 1966 yil, p. 209; Hough 1958, p. 371.
- ^ Hough 1958, pp. 254–374; Xopkins 2008 yil, p. 135.
- ^ Smit 2000 yil, pp. 184–194.
- ^ Smit 2000 yil, pp. 162–193.
- ^ Bullard 2007, p. 158; Milner 1957 yil, pp. 54–121.
- ^ Bullard 2007, p. iv.
- ^ a b "Jangovar chekinish: 1942 yil 8-avgustda Kokodadagi ikkinchi nishon". Kokoda treki: Ikkinchi jahon urushida avstraliyaliklar tomonidan olib borilgan jang maydonini o'rganish. Avstraliya Hamdo'stligi. Arxivlandi asl nusxasidan 2017 yil 4 fevralda. Olingan 11 sentyabr 2016.
- ^ Bullard 2007, pp. 142–143 & 158–160.
- ^ Bullard 2007, p. 143.
- ^ a b v Bullard 2007, p. 159.
- ^ Bullard 2007, pp. 140 & 142.
- ^ a b Bullard 2007, p. 158.
- ^ Milner 1957 yil, p. 99.
- ^ a b Bullard 2007, p. 160.
- ^ James 2009, p. 9.
- ^ Milner 1957 yil, p. 103.
- ^ Brune 2003, p. 97.
- ^ James 2009, p. 26.
- ^ a b Makkarti 1959 yil, p. 125.
- ^ Milner 1957 yil, p. 63.
- ^ Makkarti 1959 yil, 117-118 betlar.
- ^ Makkarti 1959 yil, pp. 130–131; Kienzle 2011, 136-139 betlar; James 2009, 31-32 betlar; Fitzsimons 2004, 214-215 betlar.
- ^ Brune 2003, 112–113-betlar.
- ^ Anderson 2014 yil, 46-47 betlar.
- ^ Makkarti 1959 yil, pp. 137 & 140.
- ^ Makkarti 1959 yil, p. 131.
- ^ Watson 1944, pp. 26–27 & 68.
- ^ Brune 2003, p. 119.
- ^ Mallett 2014, p. 179.
- ^ Center of Military History 1990, p. 20; Makkarti 1959 yil, p. 131.
- ^ Makkarti 1959 yil, 267-268 betlar.
- ^ Horner 1978 yil, p. 129.
- ^ Makkarti 1959 yil, p. 140.
- ^ Brune 2003, p. 121 2.
- ^ Urush kundaligi: 21-piyoda brigadasi. "AWM52 8/2/21/17 - 1942 yil avgust-oktyabr" (PDF). Avstraliya urush yodgorligi. p. 20 (of pdf). Olingan 21 may 2017.
- ^ Gillison 1962 yil, 600-601 betlar.
- ^ Imparato 1998, p. 55; Kelly 2003 yil, p. 346; Makkarti 1959 yil, p. 198; Watson & Rohfleisch 1950, p. 94.
- ^ "Bombing raid against 7 Mile Drome Port Moresby on August 17, 1942". Pacific Wrecks Incorporated. Arxivlandi asl nusxasidan 2016 yil 10 mayda. Olingan 18 iyun 2017.
- ^ a b v Makkarti 1959 yil, p. 198.
- ^ Moremon 2000, p. 174.
- ^ Gillison 1962 yil, pp. 662 & 659.
- ^ Anderson 2014 yil, pp. 52–54; Brune 2003, p. 158; Gillison 1962 yil, p. 601; Makkarti 1959 yil, pp. 195–196, 199.
- ^ a b Anderson 2014 yil, p. 34.
- ^ Moremon 2000, 171–174 betlar.
- ^ Rowell 1974, 113-115 betlar.
- ^ Brune 2003, p. 124.
- ^ Gillison 1962 yil, 601–602-betlar.
- ^ Gillison 1962 yil, p. 602.
- ^ Gillison 1962 yil, p. 601.
- ^ Makkarti 1959 yil, p. 308.
- ^ Brune 2003, p. 410.
- ^ Gillison 1962 yil, p. 630.
- ^ Horner 1978 yil, pp. 198 & 201–203.
- ^ Makkarti 1959 yil, p. 311.
- ^ Bullard 2007, 135-136-betlar.
- ^ Bullard 2007, p. 133.
- ^ Happell 2008, 79-80-betlar.
- ^ "The New Guinea Campaign". Ikkinchi jahon urushi Multimedia ma'lumotlar bazasi. Arxivlandi asl nusxasi 2009 yil 22 aprelda. Olingan 22 aprel 2009.
- ^ Tanaka 1996 yil, pp. 111–134.
- ^ Anderson 2014 yil, pp. 141 & 146.
- ^ Anderson 2014 yil, p. 193.
- ^ Makkarti 1959 yil, p. 116.
- ^ a b Makkarti 1959 yil, p. 132.
- ^ Rogerson 2012, p. 5.
- ^ James 2009, p. 18.
- ^ Iqtibos qilingan Brune 2003, 188-189 betlar.
- ^ Ham 2004, pp. 211 & 214.
- ^ Makkarti 1959 yil, 264-265 betlar.
- ^ Anderson 2014 yil, p. 117.
- ^ Makkarti 1959 yil, p. 213–215.
- ^ "Brief Account of the activities of the 7th Australian Division – Medical Services during Six Months Campaign in Papua". AWM. 481/12/13: 54. 1943.
- ^ Makkarti 1959 yil, p. 317.
- ^ Makkarti 1959 yil, p. 316.
- ^ Anderson 2014 yil, pp. 111 & 222.
- ^ Anderson 2014 yil, p. 222.
- ^ Horner 1995 yil, 341-342-betlar.
- ^ Horner 1995 yil, p. 342.
- ^ Makkarti 1959 yil, p. 357.
- ^ Makkarti 1959 yil, p. 355; Horner 1995 yil, pp. 342–344; Allan & Cutts 1994, pp. 40–41 & 62.
- ^ Anderson 2014 yil, p. 221; Threlfall 2008, p. 157–160,276.
- ^ Hocking 1997 yil, pp. 1 & 309.
- ^ Threlfall 2008, 209-bet.
- ^ Threlfall 2008, 211-bet.
- ^ McAulay 1992a, p. 186.
- ^ Makkarti 1959 yil, p. 281.
- ^ Makkarti 1959 yil, 297-298 betlar.
- ^ Makkarti 1959 yil, p. 301.
- ^ Anderson 2014 yil, p. 184–185.
- ^ a b Anderson 2014 yil, p. 111.
- ^ Uilyams 2012 yil, p. 152.
- ^ Uilyams 2012 yil, p. 161.
- ^ Anderson 2014 yil, p. 118.
- ^ Palazzo 2004 yil, 86-88 betlar.
- ^ Threlfall 2008, 216-217-betlar.
- ^ Anderson 2014 yil, p. 171.
- ^ Kolli va Marutani 2009 yil, 73-74-betlar.
- ^ Milner 1957 yil, p. 68.
- ^ Watson 1944, pp. 10, 18–20, 22–23, 28 & 33.
- ^ Milner 1957 yil, 97-98 betlar.
- ^ Watson 1944, p. 42.
- ^ Anderson 2014 yil, pp. 47 & 77; Makkarti 1959 yil, pp. 134 & 212; Watson 1944, pp. 25, 27 & 33.
- ^ Makkarti 1959 yil, 17-18 betlar.
- ^ Morton 1962 yil, pp. 370–375. Morton describes the issues of command in the Pacific arising between the Army and the Navy as they were evolving in the early stages of America entering the war.
- ^ Gailey 2004, p. 7.
- ^ Makkarti 1959 yil, 24-25 betlar.
- ^ Makkarti 1959 yil, 25-26 betlar.
- ^ Anderson 2014 yil, p. 47; Makkarti 1959 yil, p. 140.
- ^ War Diary: New Guinea Force Headquarters and General (Air). "AWM52 1/5/51/17: August 1942" (PDF). Avstraliya urush yodgorligi. pp. 41–50 (of pdf). Olingan 3 may 2017.
- ^ a b Makkarti 1959 yil, p. 225.
- ^ Larrabee 2004, p. 324.
- ^ Jons 1989 yil, p. 40.
- ^ Anderson 2014 yil, 200-201 betlar.
- ^ Makkarti 1959 yil, p. 235.
- ^ McAulay 1992b, p. 72; Fitzsimons 2004, p. 382; Brune 2003, p. 245; Horner 1978 yil, p. 162.
- ^ Anderson 2014 yil, p. 127; Horner 1978 yil, p. 195; Makkarti 1959 yil, p. 280.
- ^ Keogh 1965 yil, p. 230.
- ^ Makkarti 1959 yil, p. 229.
- ^ James 2009, p. 16.
- ^ Horner 1978 yil.
- ^ a b Anderson 2014 yil, p. 199.
- ^ Makkarti 1959 yil, p. 236.
- ^ Makkarti 1959 yil, 235-237 betlar.
- ^ Horner 1978 yil, p. 185.
- ^ Horner 1978 yil, 199-200 betlar.
- ^ Anderson 2014 yil, 199–203-betlar.
- ^ Makkarti 1959 yil, 236-240 betlar.
- ^ Horner 1984, p. 236.
- ^ Horner 1984, p. 237.
- ^ Kenni 1949 yil, p. 110.
- ^ Makkarti 1959 yil, p. 239.
- ^ Anderson 2014 yil, 202-203 betlar.
- ^ Makkarti 1959 yil, p. 238.
- ^ War Diary: New Guinea Force Headquarters and General (Air) (NG Force HQ & G (Air). "AWM52 1/5/51/18: September 1942" (PDF). Avstraliya urush yodgorligi. pp. 103–104 (of pdf). Olingan 3 may 2017.
- ^ Makkarti 1959 yil, p. 227.
- ^ Anderson 2014 yil, p. 126.
- ^ Anderson 2014 yil, 128–129 betlar.
- ^ Makkarti 1959 yil, 260–261-betlar.
- ^ Makkarti 1959 yil, 260–262 betlar.
- ^ Horner 1978 yil, p. 198.
- ^ Anderson 2014 yil, p. 129.
- ^ Anderson 2014 yil, 128-131 va 206-207-betlar.
- ^ Makkarti 1959 yil, p. 274.
- ^ Anderson 2014 yil, p. 208; Horner 1978 yil, p. 206.
- ^ Makkarti 1959 yil, 290-291 betlar.
- ^ Anderson 2014 yil, p. 170.
- ^ Anderson 2014 yil; Horner 1978 yil, 206-213 betlar; Makkarti 1959 yil, p. 307.
- ^ Anderson 2014 yil, 192 va 208-betlar.
- ^ Jeyms 2009 yil, p. 15.
- ^ Horner 1978 yil, p. 152.
- ^ Anderson 2014 yil, p. 100.
- ^ Anderson 2014 yil, p. 204.
- ^ Horner 1978 yil, p. 211.
- ^ Bruney 2003 yil, p. 252.
- ^ a b v Bruney 2003 yil, 257-258 betlar.
- ^ a b Dekan 2013 yil, p. 223.
- ^ a b Dekan 2013 yil, p. 224.
- ^ Dekan 2013 yil, p. 225.
- ^ Horner 1978 yil, p. 214.
- ^ Maughan 1966 yil, p. 528.
- ^ Horner 1978 yil, p. 207.
- ^ Horner 1978 yil, 135-223 betlar.
- ^ Horner 1978 yil, 211 va 213-betlar.
- ^ Uilyams 2012 yil, p. 205.
- ^ Horner 1978 yil, 187-188 betlar.
- ^ Horner 1978 yil, p. 280.
- ^ Iqtibos qilingan Anderson 2014 yil, p. 199
- ^ Makkarti 1959 yil, p. 122.
- ^ Anderson 2014 yil, p. 29.
- ^ McNicoll, D.D. (2007 yil 25-aprel). "Unutilgan qahramonlar". Avstraliyalik. Arxivlandi asl nusxasi 2012 yil 30 iyunda. Olingan 2 may 2007.
- ^ Anderson 2014 yil, 29-30 betlar.
- ^ Anderson 2014 yil, 30-32 betlar; Makkarti 1959 yil, 125-126-betlar.
- ^ Urush kundaligi: 39-piyoda batalyoni. "AWM52 8/3/78/4: 1942 yil iyul - dekabr" (PDF). Avstraliya urush yodgorligi. p. 7 (pdf dan). Olingan 15 may 2017.
- ^ Anderson 2014 yil, 32-33 betlar.
- ^ Makkarti 1959 yil, 126–127 betlar.
- ^ Anderson 2014 yil, p. 34; Makkarti 1959 yil, p. 127; Uilyams 2012 yil, 53-54 betlar.
- ^ a b v "Jangovar chekinish: Kokodadagi birinchi nishon 1942 yil 28-iyul". Kokoda treki: Ikkinchi jahon urushida avstraliyaliklar tomonidan olib borilgan jang maydonini o'rganish. Avstraliya Hamdo'stligi. Arxivlandi asl nusxasidan 2017 yil 3 fevralda. Olingan 11 sentyabr 2016.
- ^ Makkarti 1959 yil, p. 127.
- ^ Uilyams 2012 yil, 53-54 betlar.
- ^ Keogh 1965 yil, p. 176.
- ^ Bruney 2003 yil, 102-103 betlar.
- ^ Makkarti 1959 yil, 128–129 betlar.
- ^ Makolay 1992a, p. 53.
- ^ a b Urush kundaligi: Yangi Gvineya kuchlari shtab-kvartirasi va general (havo). "AWM52 1/5/51/15: 1942 yil iyul, 2-qism, ilovalar" (PDF). Avstraliya urush yodgorligi. 8-10 bet (pdf dan). Olingan 13 may 2017.
- ^ Urush kundaligi: 39-piyoda batalyoni. "AWM52 8/3/78/4: 1942 yil iyul - dekabr" (PDF). Avstraliya urush yodgorligi. p. 9 (pdf dan). Olingan 15 may 2017.
- ^ Milner 1957 yil, 64-65-betlar.
- ^ Urush kundaligi: Yangi Gvineya kuchlari shtab-kvartirasi va general (havo). "AWM52 1/5/51/14: 1942 yil iyul, 1 qism" (PDF). Avstraliya urush yodgorligi. 40-44 bet (pdf dan). Olingan 13 may 2017.
- ^ Urush kundaligi: 49-piyoda batalyoni. "AWM52 8/3/88/6: 1942 yil aprel - sentyabr" (PDF). Avstraliya urush yodgorligi. p. 37 (pdf dan). Olingan 15 may 2017.
- ^ Uilyams 2012 yil, p. 54.
- ^ Anderson 2014 yil, 34-39 betlar; Keogh 1965 yil, p. 176; Makkarti 1959 yil, 127–129 betlar; Uilyams 2012 yil, 53-54 betlar.
- ^ Makkarti 1959 yil, p. 130.
- ^ Urush kundaligi: 30-piyoda brigadasi. "AWM52 8/2/30/7: 1942 yil iyul - avgust" (PDF). Avstraliya urush yodgorligi. p. 6 (pdf dan). Olingan 18 may 2017.
- ^ Bruney 2003 yil, 106-107 betlar.
- ^ Anderson 2014 yil, 40-42 betlar.
- ^ Makkarti 1959 yil, 131-132-betlar.
- ^ Urush kundaligi: 39-piyoda batalyoni. "AWM52 8/3/78/4: 1942 yil iyul - dekabr" (PDF). Avstraliya urush yodgorligi. 20-24 bet (pdf dan). Olingan 15 may 2017.
- ^ Anderson 2014 yil, 40-43 betlar.
- ^ Makkarti 1959 yil, 133-135-betlar.
- ^ Bruney 2003 yil, p. 109.
- ^ Anderson 2014 yil, 42-45 betlar.
- ^ Urush kundaligi: 39-piyoda batalyoni. "AWM52 8/3/78/4: 1942 yil iyul - dekabr" (PDF). Avstraliya urush yodgorligi. p. 27 (pdf dan). Olingan 15 may 2017.
- ^ Urush kundaligi: Yangi Gvineya kuchlari shtab-kvartirasi va general (havo). "AWM52 1/5/51/17: 1942 yil avgust" (PDF). Avstraliya urush yodgorligi. 7-8 bet (pdf dan). Olingan 17 may 2017.
- ^ a b Makkarti 1959 yil, p. 137.
- ^ Anderson 2014 yil, p. 48.
- ^ Anderson 2014 yil, 48-50 betlar.
- ^ Urush kundaligi: 39-piyoda batalyoni. "AWM52 8/3/78/4: 1942 yil iyul - dekabr" (PDF). Avstraliya urush yodgorligi. p. 33 (pdf). Olingan 15 may 2017.
- ^ Uilyams 2012 yil, p. 58.
- ^ Bullard 2007 yil, p. 137.
- ^ Makkarti 1959 yil, p. 228.
- ^ a b v "Tog'larga: Isurava stendi: 1942 yil 26-31 avgust". Kokoda treki: Ikkinchi jahon urushida avstraliyaliklar tomonidan olib borilgan jang maydonini o'rganish. Avstraliya Hamdo'stligi. Arxivlandi asl nusxasidan 2016 yil 18 oktyabrda. Olingan 22 sentyabr 2016.
- ^ Uilyams 2012 yil, p. 69.
- ^ Makkarti 1959 yil, 141–143 betlar.
- ^ Makkarti 1959 yil, 194-199 betlar.
- ^ Anderson 2014 yil, p. 52.
- ^ Makkarti 1959 yil, 196 va 199-200 betlar.
- ^ Uilyams 2012 yil, p. 64.
- ^ R. Xonner, "Isuravadagi 39-chi" Kutish holati, 1956 yil iyul - avgust; keltirilgan Makkarti 1959 yil, p. 142
- ^ Uilyams 2012 yil, 69-70 betlar.
- ^ a b Anderson 2014 yil, 56-57 betlar.
- ^ Makkarti 1959 yil, 199–201-betlar.
- ^ Anderson 2014 yil, p. 53.
- ^ Makkarti 1959 yil, 200-201 betlar.
- ^ Urush kundaligi: 2/16-piyoda batalyoni. "AWM52 8/3/16/19: 1942 yil avgust - oktyabr" (PDF). Avstraliya urush yodgorligi. p. 7 (pdf dan). Olingan 19 may 2017.
- ^ Anderson 2014 yil, p. 67.
- ^ a b v Keogh 1965 yil, p. 206.
- ^ 144 piyoda polk tarixi qo'mitasi (1974) p. 18-so'z Uilyams 2012 yil, p. 72
- ^ Uilyams 2012 yil, p. 71.
- ^ Bruney 2003 yil, p. 150.
- ^ "№ 35893". London gazetasi (Qo'shimcha). 1943 yil 5-fevral. P. 695.
- ^ Bruney 2003 yil, 142 va 144-betlar.
- ^ Uilyams 2012 yil, p. 74.
- ^ Makolay 1992a, p. 135.
- ^ Urush kundaligi: 39-piyoda batalyoni. "AWM52 8/3/78/4: 1942 yil iyul - dekabr" (PDF). Avstraliya urush yodgorligi. p. 43 (pdf dan). Olingan 15 may 2017.
- ^ Bruney 2003 yil, 152-153 betlar.
- ^ Anderson 2014 yil, p. 69.
- ^ Makkarti 1959 yil, 210-211 betlar.
- ^ Anderson 2014 yil, 69-71 bet.
- ^ Anderson 2014 yil, p. 71.
- ^ Makkarti 1959 yil, p. 208.
- ^ Kolli va Marutani 2009 yil, p. 83.
- ^ Anderson 2014 yil, p. 72.
- ^ Anderson 2014 yil, p. 79.
- ^ 39-piyoda batalyoni (1942 yil dekabr). Urush kundaligi (PDF). Kanberra: Avstraliya urushiga bag'ishlangan yodgorlik. 45-49 bet (pdf dan). Olingan 29 aprel 2017.
- ^ Anderson 2014 yil, p. 77; Makkarti 1959 yil, 212, 216 va 220-betlar.
- ^ Makkarti 1959 yil, p. 211.
- ^ Anderson 2014 yil, 72-86 betlar.
- ^ Anderson 2014 yil, 83-87 betlar.
- ^ "Tog'larga: Eora'dan Templeton o'tishigacha: 1942 yil 31 avgustdan 5 sentyabrgacha". Kokoda treki: Ikkinchi jahon urushida avstraliyaliklar tomonidan olib borilgan jang maydonini o'rganish. Avstraliya Hamdo'stligi. Arxivlandi asl nusxasidan 2016 yil 12 martda. Olingan 13 iyun 2016.
- ^ Anderson 2014 yil, 88-91 betlar; Makkarti 1959 yil, 220-221 betlar.
- ^ a b "Tog'larga: Efogidagi ofat, 1942 yil 8 sentyabr". Kokoda treki: Ikkinchi jahon urushida avstraliyaliklar tomonidan olib borilgan jang maydonini o'rganish. Avstraliya Hamdo'stligi. Arxivlandi asl nusxasidan 2016 yil 12 martda. Olingan 13 iyun 2016.
- ^ Bullard 2007 yil, p. 141.
- ^ Anderson 2014 yil, p. 93.
- ^ Makkarti 1959 yil, p. 221.
- ^ Anderson 2014 yil, p. 93; Makolay 1992a, p. 186; Makkarti 1959 yil, p. 221.
- ^ Urush kundaligi: 21-piyoda brigadasi. "AWM52 8/2/21/17 - 1942 yil avgust-oktyabr" (PDF). Avstraliya urush yodgorligi. 24-26 va 111 bet (pdf dan). Olingan 21 may 2017.
- ^ Anderson 2014 yil, 95-96 betlar.
- ^ Makkarti 1959 yil, 221–222 betlar.
- ^ Anderson, Nik. "Brigada tepasi uchun jang". Bizning tariximiz. Avstraliya armiyasi. Arxivlandi asl nusxasidan 2016 yil 22 aprelda. Olingan 13 iyun 2016.
- ^ Anderson 2014 yil, 96-100 betlar; Makkarti 1959 yil, 222-223 betlar.
- ^ Anderson 2014 yil, 100-103 betlar; Makkarti 1959 yil, 223–225-betlar.
- ^ a b v d e "Tog'larga: Ioribayva tizmasidagi harakatlar: 1942 yil 14-16 sentyabr". Kokoda treki: Ikkinchi jahon urushida avstraliyaliklar tomonidan olib borilgan jang maydonini o'rganish. Avstraliya Hamdo'stligi. Arxivlandi asl nusxasidan 2016 yil 19 oktyabrda. Olingan 24 iyul 2016.
- ^ Anderson 2014 yil, 103-105 betlar; Makkarti 1959 yil, 229-230 betlar.
- ^ Anderson 2014 yil, 105-107 betlar.
- ^ Anderson 2014 yil, 106-109 betlar; Makkarti 1959 yil, 231–234 betlar.
- ^ Anderson 2014 yil, 109-110 betlar; Uilyams 2012 yil, 150-151 betlar.
- ^ a b Anderson 2014 yil, 113-115 betlar.
- ^ Horner 1978 yil, p. 168.
- ^ Anderson 2014 yil, p. 109.
- ^ "O'rmon urushi". Kokoda treki: Ikkinchi jahon urushida avstraliyaliklar tomonidan olib borilgan jang maydonini o'rganish. Avstraliya Hamdo'stligi. Arxivlandi asl nusxasidan 2017 yil 20 fevralda. Olingan 23 may 2017.
- ^ Keogh 1965 yil, p. 211.
- ^ Keogh 1965 yil, p. 211; Makkarti 1959 yil, p. 241.
- ^ Horner 1978 yil, p. 169.
- ^ Tompson 2008 yil, p. 356.
- ^ Keogh 1965 yil, p. 215.
- ^ Anderson 2014 yil, p. 116; Jeyms 2009 yil, p. 19; Makkarti 1959 yil, 244-246 betlar.
- ^ Makkarti 1959 yil, 244-246 betlar.
- ^ Anderson 2014 yil, 121-131 betlar.
- ^ "Tide burilishlari: Avstraliyaning Eora tomon yurishi: 1942 yil 13-27 oktyabr". Kokoda treki: Ikkinchi jahon urushida avstraliyaliklar tomonidan olib borilgan jang maydonini o'rganish. Avstraliya Hamdo'stligi. Arxivlandi asl nusxasidan 2017 yil 4 fevralda. Olingan 27 avgust 2016.
- ^ Makkarti 1959 yil, 268–269 betlar.
- ^ Urush kundaligi: 16-piyoda Bigade. "AWM52 8/2/16/18 - 1942 yil oktyabr" (PDF). Avstraliya urush yodgorligi. 12-14 bet (pdf dan). Olingan 23 may 2017.
- ^ Anderson 2014 yil, 132–141 betlar.
- ^ Uilyams 2012 yil, p. 193.
- ^ Urush kundaligi: 2/25-piyoda batalyoni. "AWM52 8/3/25/18 - 1942 yil sentyabr - dekabr" (PDF). Avstraliya urush yodgorligi. 38-41 bet (pdf dan). Olingan 23 may 2017.
- ^ a b Maitland 1999 yil, p. 142.
- ^ Makkarti 1959 yil, 273-275-betlar.
- ^ Anderson 2014 yil, 144–149 betlar.
- ^ Makkarti 1959 yil, 275–276 va 282–286.
- ^ Anderson 2014 yil, 149–157 va 173-betlar.
- ^ Anderson 2014 yil, 158–161-betlar.
- ^ Anderson 2014 yil, 158–161-betlar; Makkarti 1959 yil, 287-288 betlar; Uilyams 2012 yil, p. 198.
- ^ Makkarti 1959 yil, 288 va 301-betlar.
- ^ Makkarti 1959 yil, 297-301 betlar.
- ^ Anderson 2014 yil, 163–185-betlar.
- ^ Makkarti 1959 yil, 301-303 betlar.
- ^ Anderson 2014 yil, 185-192 betlar.
- ^ Makkarti 1959 yil, p. 307.
- ^ Anderson 2014 yil, 193-194 betlar; Bullard 2007 yil, 168–169 betlar; Jeyms 2009 yil, p. 21.
- ^ a b v d "Tide burilishlari: hal qiluvchi moment - Oivi-Gorari, 1942 yil 10-noyabr". Kokoda treki: Ikkinchi jahon urushida avstraliyaliklar tomonidan olib borilgan jang maydonini o'rganish. Avstraliya Hamdo'stligi. Arxivlandi asl nusxasidan 2016 yil 12 martda. Olingan 24 iyun 2016.
- ^ "Tide burilishlari: Kokodani qayta qabul qilish: Kokoda qayta qo'lga kiritildi, 1942 yil 2-noyabr". Kokoda treki: Ikkinchi jahon urushida avstraliyaliklar tomonidan olib borilgan jang maydonini o'rganish. Avstraliya Hamdo'stligi. Arxivlandi asl nusxasidan 2017 yil 20 fevralda. Olingan 25 may 2017.
- ^ Anderson 2014 yil, 193-194 betlar.
- ^ Makkarti 1959 yil, p. 324; Milner 1957 yil, p. 121 2.
- ^ Milner 1957 yil, p. 121 2.
- ^ Milner 1957 yil, 120-124-betlar.
- ^ Makkarti 1959 yil, 329–333-betlar.
- ^ Milner 1957 yil, p. 25.
- ^ Milner 1957 yil, 92-94 betlar.
- ^ Milner 1957 yil, 92-115 betlar.
- ^ Milner 1957 yil, 115-124-betlar.
- ^ Geyli 2000 yil, p. 109.
- ^ Paul 1958 yil, 279–291 betlar.
- ^ "39-avstraliyalik piyoda batalyoni". Ikkinchi Jahon urushi, 1939–45 birliklar. Avstraliya urush yodgorligi. Olingan 6 mart 2009.
- ^ Keogh 1965 yil, 393-428 betlar.
- ^ Makkarti 1959 yil, 234 va 334-betlar.
- ^ Johnston 2007 yil, p. 23.
- ^ Uilyams 2012 yil, p. 241.
- ^ a b v d Makkarti 1959 yil, p. 335.
- ^ "Yaponiya leytenanti Tazaki ustidan sud jarayoni". Avstraliya urush yodgorligi. Arxivlandi asl nusxasi 2012 yil 25 avgustda. Olingan 21 aprel 2009.
- ^ "Yaponiyada yashirinib yurish paytida kannibalizmning kashf etilishi". Avstraliya urush yodgorligi. Arxivlandi asl nusxasi 2012 yil 25 avgustda. Olingan 21 aprel 2009.
- ^ Anderson 2014 yil, p. 71; Makkarti 1959 yil, 138-139 betlar.
- ^ Anderson 2014 yil.
- ^ Macquarie lug'ati (4 nashr). 2005. p. 791.
- ^ Jeyms 2009 yil, 55-61 bet.
- ^ "Avstraliya armiyasining jangovor sharaflari: Ikkinchi jahon urushi: Tinch okeanning janubi-g'arbiy qismi" (PDF). Avstraliya armiyasi. Olingan 5 iyun 2017.
- ^ De Souza, P. "Kokoda front liniyasi! (1942)". australianscreen (Avstraliya milliy filmi va ovozli arxivi). Arxivlandi asl nusxasidan 2017 yil 29 iyuldagi. Olingan 11 iyun 2017.
- ^ Teylor, B. "Avstraliyaliklar birinchi Oskar". Milliy kino va ovozli arxiv Avstraliya. Arxivlandi asl nusxasidan 2017 yil 2 avgustda. Olingan 11 iyun 2017.
- ^ Stenli 2008 yil, p. 186.
- ^ Stenli 2008 yil, 191-192 betlar.
- ^ Stefens, Toni (2002 yil 2-avgust). "Nima uchun Milne Bay Kokoda afsonasining bir qismidir". Yosh. Melburn. Arxivlandi 2011 yil 4 iyundagi asl nusxadan. Olingan 30 yanvar 2010.
- ^ Uilyams 2012 yil, p. 233.
- ^ Keogh 1965 yil, 226–227 betlar.
- ^ Milner 1957 yil, p. 378.
- ^ a b Anderson 2014 yil, p. 213.
- ^ Milner 1957 yil, p. 376.
- ^ Palazzo 2004 yil, 86-101 betlar.
- ^ Threlfall 2008 yil.
- ^ Threlfall 2014 yil.
- Bibliografiya
- Allan, Jek; Kutts, Kris (1994). Bizga ko'rinib turganidek: 1-avstraliyalik tog 'batareyasi, RAA, AIF. Brisben, Kvinslend: AEbis. ISBN 978-0-646-17515-7.CS1 maint: ref = harv (havola)
- Anderson, Nikolay (2014). Kokoda. Avstraliya armiyasining kampaniyalari seriyasi - 14. Sidney, Yangi Janubiy Uels: Big Sky nashriyoti. ISBN 978-1-922132-95-6.CS1 maint: ref = harv (havola)
- Bleyli, Gerbert (1957). Ikkinchi jahon urushidagi 32-piyoda diviziyasi. Meyson, Viskonsin: o'ttiz ikkinchi piyoda diviziyasi tarixi komissiyasi. OCLC 3465460.
- Brune, Piter (2003). Bir joyning pichiri: avstraliyaliklar Papuada. Crows Nest, Yangi Janubiy Uels: Allen va Unvin. ISBN 1-74114-403-5.CS1 maint: ref = harv (havola)
- Bullard, Stiven (tarjimon) (2007). Yaponiya armiyasining Janubiy Tinch okean mintaqasidagi operatsiyalari: Yangi Buyuk Britaniya va Papua kampaniyalari, 1942–43. Kanberra: Avstraliya urushiga bag'ishlangan yodgorlik. ISBN 978-0-9751904-8-7.CS1 maint: ref = harv (havola)
- Kates, Jon (2006). Avstraliya urushlari atlasi. Melburn: Oksford universiteti matbuoti. ISBN 0-19-555914-2.CS1 maint: ref = harv (havola)
- Kolli, Kreyg; Marutani, Xajime (2009). Cheksiz qayg'u yo'li: Kokoda yo'lidagi yaponlar. Crows Nest, Yangi Janubiy Uels: Allen va Unvin. ISBN 978-1-74175-839-9.CS1 maint: ref = harv (havola)
- Kultard-Klark, Kris (1998). Avstraliya janglari ensiklopediyasi. Sidney: Allen va Unvin. ISBN 1-86448-611-2.CS1 maint: ref = harv (havola)
- Kreyven, Uesli; Keyt, Jeyms (1948). Ikkinchi Jahon Urushidagi Armiya Havo Kuchlari, 1-jild: Rejalar va dastlabki operatsiyalar - 1938 yil yanvaridan 1942 yil avgustigacha. Chikago: Chikago universiteti matbuoti. OCLC 704158.
- Day, David (1999). Jon Kurtin. Hayot. Sidney: HarperCollins Publishers. ISBN 0-7322-6413-8.CS1 maint: ref = harv (havola)
- Dekan, Piter (2013). "Anzak va Yanks: AQSh va Avstraliyaning Plyajdagi janglardagi operatsiyalari". Dekanda, Piter (tahrir). Avstraliya 1942 yil: Urush soyasida. Kembrij: Kembrij universiteti matbuoti. ISBN 978-1-107-03227-9. LCCN 2012464720.CS1 maint: ref = harv (havola)
- Dennis, Piter; Grey, Jefri; Morris, Evan; Oldin, Robin; Bou, Jan (2008). Avstraliya harbiy tarixidagi Oksford sherigi (Ikkinchi nashr). Melburn: Oksford universiteti matbuoti. ISBN 978-0-19-551784-2.
- Armiya bo'limi (1994) [1966]. Tinch okeanining janubi-g'arbiy qismida Yaponiyaning operatsiyalari, II jild - II qism. General MakArturning ma'ruzalari. Amerika Qo'shma Shtatlari armiyasining harbiy tarix markazi.
- Dod, Karl (1966). Muhandislar korpusi: Yaponiyaga qarshi urush. Vashington, Kolumbiya: Qo'shma Shtatlar armiyasi departamenti. OCLC 17765223.CS1 maint: ref = harv (havola)
- Dufty, Devid (2017). Markaziy byuroning maxfiy qoidalarini buzuvchilar. Melburn, London: Yozuvchi. ISBN 9781925322187.CS1 maint: ref = harv (havola)
- Fitzsimons, Piter (2004). Kokoda. Sidney: Hachette. ISBN 9780733619625. LCCN 2005440684.CS1 maint: ref = harv (havola)
- Geyli, Garri (2000). Makartur orqaga qaytadi. Novato: Presidio Press. ISBN 0-89141-702-8.CS1 maint: ref = harv (havola)
- Geyli, Garri A. (2004). Makarturning g'alabasi Yangi Gvineyadagi urush, 1943–1944 (1-nashr). Nyu-York: Presidio Press. ISBN 978-0-307-41593-6.CS1 maint: ref = harv (havola)
- Gillison, Duglas (1962). Avstraliya qirollik havo kuchlari 1939–1942. 1939–1945 yillardagi urushda Avstraliya. 3-seriya - Havo. I jild. Kanberra: Avstraliya urushiga bag'ishlangan yodgorlik. OCLC 2000369.CS1 maint: ref = harv (havola)
- Grey, Jeffri (1999). Avstraliyaning harbiy tarixi. Kembrij: Kembrij universiteti matbuoti. ISBN 0-521-64483-6.CS1 maint: ref = harv (havola)
- Grey, Jeffri (2001). Avstraliya armiyasi. Avstraliya yuz yillik mudofaa tarixi (Birinchi nashr). Melburn: Oksford universiteti matbuoti. ISBN 0-19-554114-6.
- Xom, Pol (2004). Kokoda. Sidney, Yangi Janubiy Uels: HarperCollins. ISBN 978-0-7322-9836-4.CS1 maint: ref = harv (havola)
- Xappell, Charlz (2008). Kokodaning suyak odami. Sidney: Makmillan. ISBN 978-1-4050-3836-2.CS1 maint: ref = harv (havola)
- Xarris, Meyrion; Harris, Syuzi (1991). Quyoshning askarlari: Yaponiya imperatori armiyasining ko'tarilishi va qulashi. Nyu York: Tasodifiy uy. ISBN 0-679-75303-6.
- Xaruki Yoshida (2017). "Yapon qo'mondonlari Kokodada". Jeymsda, Karl (tahrir). Kokoda: Afsonadan tashqari. Kembrij: Kembrij universiteti matbuoti. 206-221 betlar. ISBN 978-1-107-18971-3.CS1 maint: ref = harv (havola)
- Hawthorne, Stuart (2003). Kokoda izi. Kvinslend: Markaziy Kvinslend universiteti matbuoti. ISBN 1-876780-30-4.
- Hocking, Philip (1997). Uzoq olib yurish: 2/1-avstraliyalik pulemyot batalyonining tarixi, 1939-1946. Melburn, Viktoriya: 2/1 avtomat batalyon assotsiatsiyasi. ISBN 0-646-30817-3.CS1 maint: ref = harv (havola)
- Horner, Devid (1978). Buyruq inqirozi. Avstraliya generalligi va yapon tahdidi, 1941–1943. Kanberra: Avstraliya milliy universiteti Matbuot. ISBN 0-7081-1345-1.CS1 maint: ref = harv (havola)
- Horner, Devid, ed. (1984). Qo'mondonlar: Yigirmanchi asrda Avstraliya harbiy rahbarligi. Sidney: Allen va Unvin. ISBN 9780868614960.CS1 maint: ref = harv (havola)
- Horner, Devid (1993 yil may). "1942 yilda Avstraliyani himoya qilish". 1942 yil Tinch okeanidagi urush. Urush va jamiyat. Kanberra: Tarix bo'limi, Avstraliya mudofaa kuchlari akademiyasi. ISSN 0729-2473.CS1 maint: ref = harv (havola)
- Horner, Devid (1995). To'pchilar: Avstraliya artilleriyasining tarixi. Sent-Leonards, Yangi Janubiy Uels: Allen va Unvin. ISBN 978-1-86373-917-7.CS1 maint: ref = harv (havola)
- Horner, Devid (1998). Blamey: Bosh qo'mondon. Sent-Leonards, Yangi Janubiy Uels: Allen va Unvin. ISBN 978-1-86448-734-3.
- Xopkins, Uilyam B. (2008). Tinch okeani urushi: strategiya, siyosat va urushda g'olib bo'lgan futbolchilar. Minneapolis: MBI nashriyoti. ISBN 978-1-61673-240-0.CS1 maint: ref = harv (havola)
- Xou, Frank O .; Lyudvig, Verle E.; Shou, Genri I. Kichik (1958). Pearl Harbor-dan Guadalkanalgacha. Ikkinchi Jahon Urushidagi AQSh dengiz piyoda qo'shinlari operatsiyalari tarixi. Men. Tarixiy filial, G-3 bo'limi, shtab-kvartirasi, AQSh dengiz piyodalari korpusi. OCLC 11613327.
- Imparato, Edvard (1998). 374-chi qo'shin tashuvchilar guruhi. Paduka, Kentukki: Turner nashriyot kompaniyasi. ISBN 1-63026-949-2.CS1 maint: ref = harv (havola)
- Jeyms, Karl (2009). ""Track: "Tarixiy ish stoli Kokoda trekini o'rganish". (PDF). Hamdo'stlik atrof-muhit boshqarmasi. Olingan 29 noyabr 2014.CS1 maint: ref = harv (havola)
- Jeyms, Karl (2013). "Avstraliyaning eshik oldida: Kokoda va Milne Bay". Dekanda, Piter (tahrir). Avstraliya 1942 yil: Urush soyasida. Port Melburn, Viktoriya: Kembrij universiteti matbuoti. 199-215 betlar. ISBN 978-1-10703-227-9.CS1 maint: ref = harv (havola)
- Jonston, Mark (2007). Avstraliya armiyasi Ikkinchi jahon urushida. Botley, Oksford: Osprey nashriyoti. ISBN 978-1-84603-123-6.CS1 maint: ref = harv (havola)
- Jons, Laurens (1989). Bunaga qarshi jangda Filippin mudofaasi: General Duglas MacArturning tanqidiy tahlili (PDF). Maksabel havo kuchlari bazasi, Alabama: Air War College, Air University. OCLC 834250873. Olingan 29 dekabr 2014.CS1 maint: ref = harv (havola)
- Jyett, Fillip; Endryu, Stiven (2002). Yaponiya armiyasi 1931–45 (2): 1942–45. Botley, Oksford: Osprey nashriyoti. ISBN 978-1-84176-354-5.
- Kelly, Robert (2003). 1903-1943 yillarda havo transportining rivojlanishi. Ikkinchi Jahon Urushida Janubiy G'arbiy Tinch okeani mintaqasida ittifoqdosh havo transporti operatsiyalari 1. Buderim, Qld: Robert H Kelly. ISBN 0-64642-637-0.CS1 maint: ref = harv (havola)
- Kenney, Jorj C. (1949). General Kenneyning hisobotlari: Tinch okeanidagi urushning shaxsiy tarixi. Nyu-York shahri: Duell, Sloan va Pirs. ISBN 0160613728.CS1 maint: ref = harv (havola)
- Keogh, E.G (1965). Janubiy G'arbiy Tinch okeani 1941–45. Melburn: Grayflower nashrlari. OCLC 7185705.CS1 maint: ref = harv (havola)
- Kienzle, Robin (2011). Kokoda me'mori. Sidney: Hachette. ISBN 9780733627637. OCLC 710810025.CS1 maint: ref = harv (havola)
- Larrabee, Erik (2004). Bosh qo'mondon: Franklin Delano Ruzvelt, uning leytenantlari va ularning urushi. Annapolis: dengiz instituti matbuoti. ISBN 1-59114-455-8.CS1 maint: ref = harv (havola)
- Meytlend, Gordon (1999). Ikkinchi Jahon urushi va uning Avstraliya armiyasining jangovor sharaflari. Sharqiy Rozil, Yangi Janubiy Uels: Kangaroo Press. ISBN 0-86417-975-8.CS1 maint: ref = harv (havola)
- Macquarie lug'ati (4-nashr). Leyn-Kov, Yangi Janubiy Uels: Ikki karra Avstraliya. 2005 yil. ISBN 0-86824-056-7.
- Makolay, Leks (1992a). Qon va temir: 1942 yil Kokoda uchun jang. Milsons Point, Yangi Janubiy Uels: o'q kitoblari. ISBN 0-09-182628-4.CS1 maint: ref = harv (havola)
- Makolay, Leks (1992b). Achchiq oxirigacha: Yaponiyaning Buna va Gona shahridagi mag'lubiyati, 1942–43. Sidney: Tasodifiy uy. ISBN 0091825571.CS1 maint: ref = harv (havola)
- Makkarti, Dadli (1959). Tinch okeanining janubi-g'arbiy zonasi - Birinchi yil: Kokodadan Vauga. Avstraliya 1939–45 yillardagi urushda, 1-seriya - Armiya. Volume V. Canberra: Avstraliya urush yodgorligi. OCLC 3134247.CS1 maint: ref = harv (havola)
- Mallett, Ross (2014). "Logistika va aravachalar bilan ishlash". Dekanda, Piter (tahrir). Avstraliya 1943 yil: Yangi Gvineyaning ozod qilinishi. Port Melburn, Viktoriya: Kembrij universiteti matbuoti. 167–185 betlar. ISBN 978-1-107-03799-1.CS1 maint: ref = harv (havola)
- Maughan, Barton (1966). Tobruk va El Alamein. 1939–1945 yillardagi urushda Avstraliya. 1-seriya - armiya. III jild. Kanberra: Avstraliya urushiga bag'ishlangan yodgorlik. OCLC 954993.CS1 maint: ref = harv (havola)
- Milner, Samuel (1957). Papuadagi g'alaba. Vashington, Kolumbiya: Qo'shma Shtatlar armiyasi departamenti. ISBN 1-4102-0386-7.CS1 maint: ref = harv (havola)
- Moremon, Jon (2000). Improvizatsiyaning g'alabasi: Avstraliya armiyasining operatsion logistikasi va Papua shahridagi kampaniya, 1942 yil iyuldan 1943 yil yanvargacha.. Kanberra: Avstraliya mudofaa kuchlari akademiyasi. OCLC 648818801.CS1 maint: ref = harv (havola)
- Morton, Lui (1962). Strategiya va buyruq: Birinchi ikki yil. Ikkinchi Jahon Urushidagi Qo'shma Shtatlar armiyasi: Tinch okeanidagi urush. Vashington: Harbiy tarix markazi, Amerika Qo'shma Shtatlari armiyasi. OCLC 1355622.CS1 maint: ref = harv (havola)
- Papua kampaniyasi: Buna-Sanananda operatsiyasi 1942 yil 16-noyabr - 1943 yil 23-yanvar. Vashington, DC: Amerika Qo'shma Shtatlari armiyasining harbiy tarix markazi. 1990 yil. LCCN 91601186. OCLC 21992748. Arxivlandi asl nusxasi (PDF) 2001 yil 10-iyulda.
- Palazzo, Albert (2004). "O'rmon urushini tashkil etish". Dennisda Piter; Grey, Jeffri (tahrir). G'alabaning asoslari: 1943–1944 yillarda Tinch okeanidagi urush. Kanberra: armiya tarixi bo'limi. 86-101 betlar. ISBN 978-0-646-43590-9. Asl nusxasidan arxivlandi 2016 yil 9 mart.CS1 maint: ref = harv (havola) CS1 maint: BOT: original-url holati noma'lum (havola)
- Pol, Raymond (1958). Kokodadan chekinish: Yangi Gvineyadagi Avstraliya kampaniyasi, 1942 yil (1983 yil nashr). Richmond, Viktoriya: Uilyam Xaynermann Avstraliya. ISBN 0-85561-049-2.CS1 maint: ref = harv (havola)
- Perus, Yvon (1993). Papua-Yangi Gvineyada bushvalking (2-nashr). Xotorn, Viktoriya: Yolg'iz sayyora. ISBN 0-86442-052-8.CS1 maint: ref = harv (havola)
- Pilger, Alison (1993). "Jasorat, chidamlilik va tashabbus: 1942 yil avgust-oktyabr oylari Kokoda yo'lidan tibbiy evakuatsiya". Urush va jamiyat. 11 (1): 53–72. doi:10.1179/072924793791198868. ISSN 0729-2473.CS1 maint: ref = harv (havola)
- Rogerson, Emma (2012). "" Fuzzy Wuzzy Angels ": afsonadan tashqariga qarash" (PDF). Avstraliya urush yodgorligi.CS1 maint: ref = harv (havola)
- Rowell, Sidney (1974). To'liq doira. Melburn: Melburn universiteti matbuoti. ISBN 0-522-84058-2.CS1 maint: ref = harv (havola)
- Smit, Maykl (2000). Qonli tizma: Gvadalkanalni qutqargan jang. Nyu-York: cho'ntak. ISBN 0-7434-6321-8.CS1 maint: ref = harv (havola)
- Stenli, Piter (2007). "Avstraliya uchun jang nima?" (PDF). Avstraliya armiyasi jurnali. 4 (2, 2007 yil qish).CS1 maint: ref = harv (havola)
- Stenli, Piter (2008). Avstraliyani bosib olish. Yaponiya va Avstraliya uchun jang, 1942 yil. Melburn: Penguen Avstraliya. ISBN 978-0-670-02925-9.CS1 maint: ref = harv (havola)
- Tanaka, Toshiyuki (1996). Yashirin dahshatlar: Ikkinchi jahon urushidagi Yaponiyaning urush jinoyatlari (Tasvirlangan tahrir). Boulder: Westview Press. ISBN 0-8133-2718-0.CS1 maint: ref = harv (havola)
- Tompson, Piter (2008). Tinch okeanining g'azabi: Avstraliya va uning ittifoqchilari Yaponiya ofatini qanday engishdi. Shimoliy Sidney: Uilyam Xaynemann. ISBN 978-1-74166-708-0.CS1 maint: ref = harv (havola)
- Threlfall, Adrian (2008). Avstraliya armiyasining o'rmon urushining rivojlanishi (PDF) (PhD). Viktoriya universiteti. OCLC 428961444. Olingan 1 noyabr 2014.CS1 maint: ref = harv (havola)
- Threlfall, Adrian (2014). O'rmon jangchilari: Tobrukdan Kokoda va undan tashqariga qadar, qanday qilib Avstraliya armiyasi dunyodagi eng halokatli o'rmon jangchilariga aylandi. Sidney: Allen va Unvin. ISBN 978-1-74237-220-4.CS1 maint: ref = harv (havola)
- Walker, Allan (1956). Orol kampaniyalari. Avstraliya 1939–45 yillardagi urushda, 5-seriya - Tibbiy. III jild. Kanberra: Avstraliya urushiga bag'ishlangan yodgorlik. OCLC 249848614.CS1 maint: ref = harv (havola)
- Uotson, Richard L. Jr (1944). USAAF tarixiy tadqiqoti № 17: Papua kampaniyasida havo harakatlari, 1942 yil 21-iyuldan 1943-yil 23-yanvargacha (PDF). Vashington, DC: USAAF tarixiy idorasi. OCLC 22357584.CS1 maint: ref = harv (havola)
- Uotson, Richard L.; Rohfleisch, Kramer J. (1950). "Tinch okeanining janubiy va janubi-g'arbiy qismidagi inqiroz". Kreyvenda Uesli Frank; Keyt, Jeyms Lea (tahrir). Tinch okeani: Saydanga Guadalkanal, 1942 yil avgustdan 1944 yil iyulgacha. Ikkinchi jahon urushida armiya havo kuchlari. IV jild. Chikago: Chikago universiteti matbuoti. OCLC 5732980. Olingan 18 iyun 2017.CS1 maint: ref = harv (havola)
- Vigmor, Lionel (1957). Yaponlarning ishonchi. 1939–1945 yillardagi urushda Avstraliya. 1-seriya - armiya. IV jild. Kanberra: Avstraliya urushiga bag'ishlangan yodgorlik. OCLC 3134219.CS1 maint: ref = harv (havola)
- Uilyams, Piter (2012). Kokoda kampaniyasi 1942: afsona va haqiqat. Melburn, Viktoriya: Kembrij universiteti matbuoti. ISBN 978-1-10701-594-4.CS1 maint: ref = harv (havola)
Qo'shimcha o'qish
- Kempbell, Jeyms (2007). Ghost Mountain Boys: Ularning epik marshi va Yangi Gvineya uchun dahshatli jang - Janubiy Tinch okeanining unutilgan urushi. Nyu-York: toj. ISBN 978-0-307-33596-8.
- Frei, Genri P. (1991). Yaponiyaning Southward Advance va Avstraliya. XVI asrdan Ikkinchi jahon urushigacha. Melburn: Melburn universiteti matbuoti. ISBN 0-522-84392-1.
- Johnston, Mark (2005). Silent 7: 7-Avstraliya bo'linmasining tasvirlangan tarixi 1940–46. Qarg'alar uyasi: Allen va Unvin. ISBN 1-74114-191-5.
- McKenney, Janice E. (2007). Dala artilleriyasining tashkiliy tarixi, 1775–2003 (PDF). Harbiy tarix markazi, Amerika Qo'shma Shtatlari armiyasi. OCLC 217152972. Olingan 24-noyabr 2014.
- Rottman, Gordon (2005). Yaponiya armiyasi Ikkinchi jahon urushida: Tinch okeanini zabt etish 1941–42. Oksford: Osprey. ISBN 1-84176-789-1.
- Oq, Osmar (1992) [1945]. Yashil zirh. Avstraliya urush klassikalari. Ringwood: Pingvin. ISBN 0-14-014706-3.
- "Urilgan yo'lda". Sidney Morning Herald. 2004 yil 1-iyul.
- Willmott, H.P. (1983). To'siq va nayza: Yaponiya va ittifoqdosh Tinch okeani strategiyalari, 1942 yil fevraldan iyungacha. Amerika Qo'shma Shtatlari dengiz instituti matbuoti. ISBN 0-87021-092-0.
Tashqi havolalar
- Kokoda Front Line!, Oskar mukofotiga sazovor bo'lgan aksiya bo'yicha kinoxronika
- Kokoda trassasi (Veteranlar bilan ishlash bo'limi veb-sayti)
- Kokoda trek jamg'armasi
- Kokoda yodgorlik fondi
Koordinatalar: 8 ° 52′39.95 ″ S 147 ° 44′14.99 ″ E / 8.8777639 ° S 147.7374972 ° E